

Prerequisites
- Access to the Auxia Console with permission to create connections
- A GCP project containing the BigQuery datasets you want to connect
-
Permission to grant IAM roles on that project or dataset:
If you don’t have these, the wizard generates the exact commands to hand to your GCP administrator.
- Tables that meet the table requirements
Setup instructions
1
Start a new connection
In the Auxia Console, go to Configuration → Connections, click Add New Connection, and choose BigQuery.The wizard shows a service account email unique to your Auxia project. You’ll grant this account read access in the next step.
2
Enter your project and grant access
Enter:
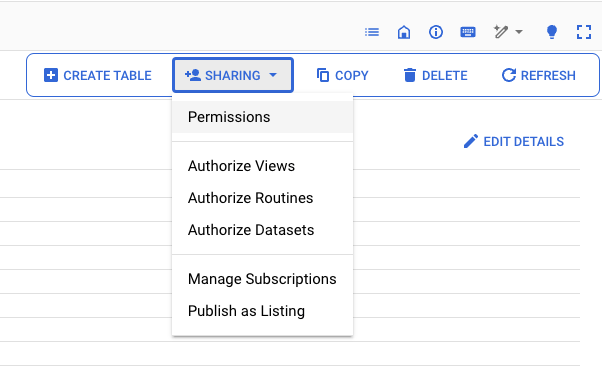
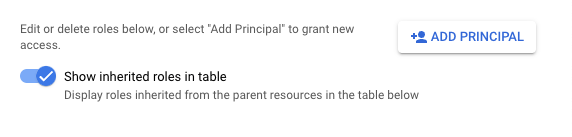
Then grant the service account the BigQuery Data Viewer role (
roles/bigquery.dataViewer) using any one of these methods:- Command line
- Google Cloud console
- Cloud Shell
The wizard generates these commands with your project and service account filled in — copy them from there.Project-level access (all current and future datasets in the project):Dataset-level access (run once per dataset):
3
Validate the connection
Back in the wizard, click Validate / Test Connection. Auxia runs four checks and shows each as it completes:If some datasets fail (for example, Access denied or Dataset not found), the wizard reports “Connection failed for N datasets” and lists each with the reason and a ready-to-run grant command. Run it, wait 2–3 minutes, and retry — or continue with the datasets that connected.
- Verify BigQuery access permissions
- Explore datasets and tables
- Validate table format and structure
- Analyze schemas for field mapping
IAM changes take 2–5 minutes to propagate. If validation fails right after you grant access, wait and retry — don’t re-grant.
4
Choose what to sync
Every table Auxia discovered is listed with its checks: partition column, append support, size, table type, and Sample Rows to preview.
Select the tables to carry forward.
5
Map Primary User ID
Pick the column that is most consistently present and unique across your data — the same
userId you pass to the Get Treatments API. Auxia’s agent scans your selected tables, proposes a candidate, and shows its coverage.Tables are sorted into groups:Resolving an ID with a join. If a table has no usable user ID — device or session events, for example — join it to a table that has one, such as a user-mapping table. Choose the key columns on each side, then under Resolves Auxia user_id from, the column whose values become the user ID. Joins can chain through up to five tables (Hop 1, Hop 2, …). Use an INNER join for ID resolution; key columns must have the same data type.A mapping table’s timestamp usually records when the mapping was made, not when an event happened — don’t map it as an event timestamp.See Understanding the primary user ID for how to choose well.
6
Match Fields to Auxia Schema
For each table, review the role Auxia’s agent assigned to every column — user ID, event name, event timestamp, event property, user attribute, and so on — and correct anything that’s wrong. Unchecked columns are skipped. When you correct one column, the agent offers to apply the same change to similar fields in other tables.The wizard enforces the minimum mapping for each table type (for example, event tables need an event name and an event timestamp). If every row in a table is the same event, type an event name and Auxia applies it to all rows.Use the two previews to check your work:
- Source preview — raw sample rows with your column names
- Unified preview — a sample of the output in Auxia’s schema, with mapping and joins applied
7
Add filters (optional)
Leave out rows you don’t want ingested. Build conditions on any column — text, number, date, and boolean operators — and group them with AND / OR. The summary always reads “Leaves out rows where …” so the direction is never ambiguous.Filters apply to new syncs and backfills. Adding a filter never removes rows already in Auxia.
8
View the sync schedule
The schedule step shows each table’s Ingestion Schedule (hourly, daily, or weekly) and region. Auxia sets the schedule from each table’s shape — there’s nothing to set here.
9
Review & Submit
Check the GCP project, datasets, primary user ID, and Tables to Ingest — each table’s dataset, type, schedule, and Pipeline. Then choose:
- Enable Ingestion — creates one configuration per table and switches ingestion on. The first sync starts within 1–2 minutes, and you’re taken to Import Configurations.
- Enable Later — creates the configurations switched off (Dormant). Enable them later from Configuration → Connections → Import Configurations.