

COPY INTO.
The recommended method for connecting Snowflake to Auxia is Direct Connection, where Auxia reads your tables in place via a read-only role — no export jobs to build or maintain. Use GCS Export if you’d rather push files to Auxia on your own schedule.
1. Overview
In this approach, data is exported from Snowflake directly to Auxia’s GCS bucket using Snowflake’s nativeCOPY INTO command. Auxia then ingests the data from there.
Flow:
2. What Auxia Provides
Auxia will provide:- Destination GCS bucket path (e.g.,
gcs://<your_bucket_path>/)
3. Prerequisites
- The user performing this setup must be granted the
ACCOUNTADMINrole (required for creating storage integrations). - A running Snowflake warehouse for compute.
4. Running SQL in Snowflake
All SQL commands in this guide are executed using Snowflake’s web interface (Snowsight). To open a SQL worksheet:-
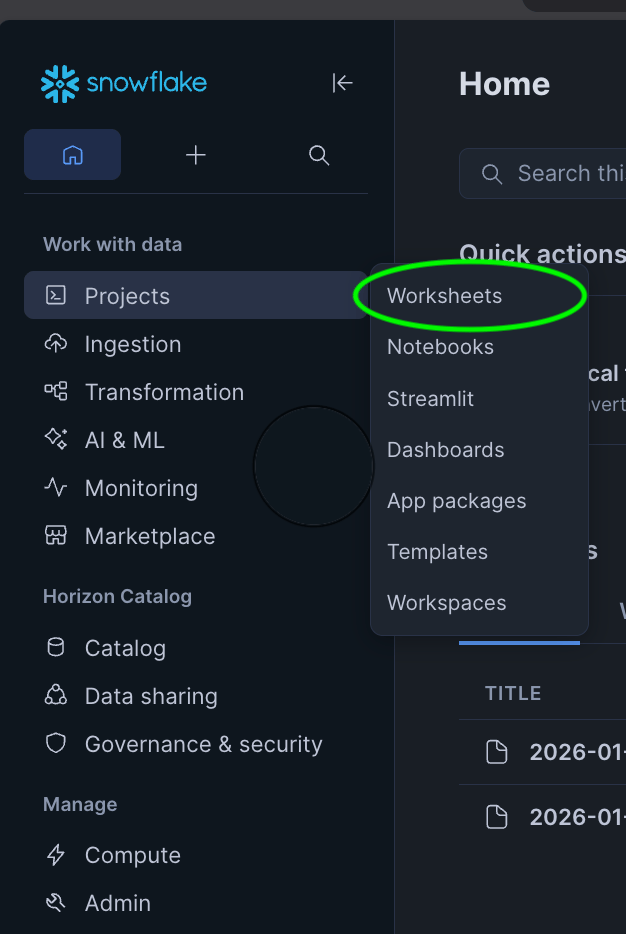
In the left navigation menu, select Projects → Worksheets
-
Click the + button in the top-right corner
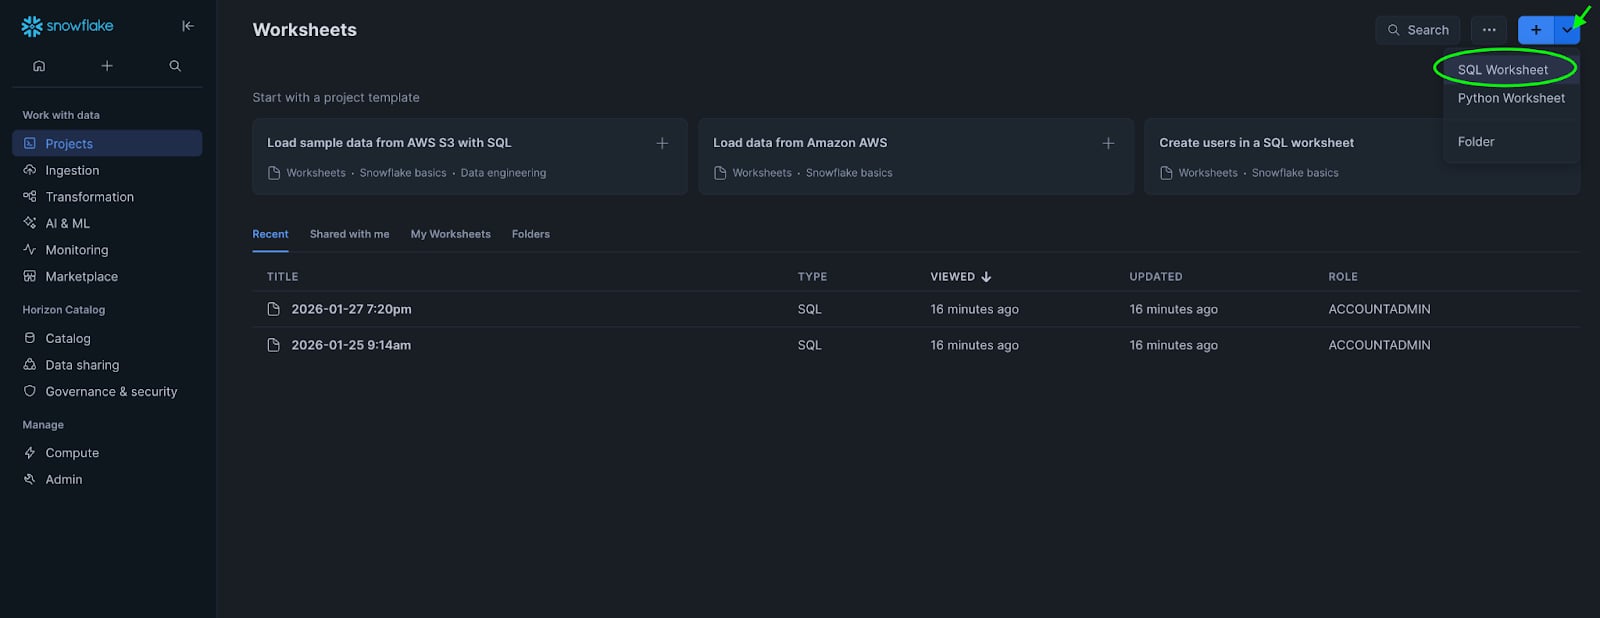
- Select SQL Worksheet
-
In the top-right corner of the worksheet, select your Role (use
ACCOUNTADMINfor storage integration commands)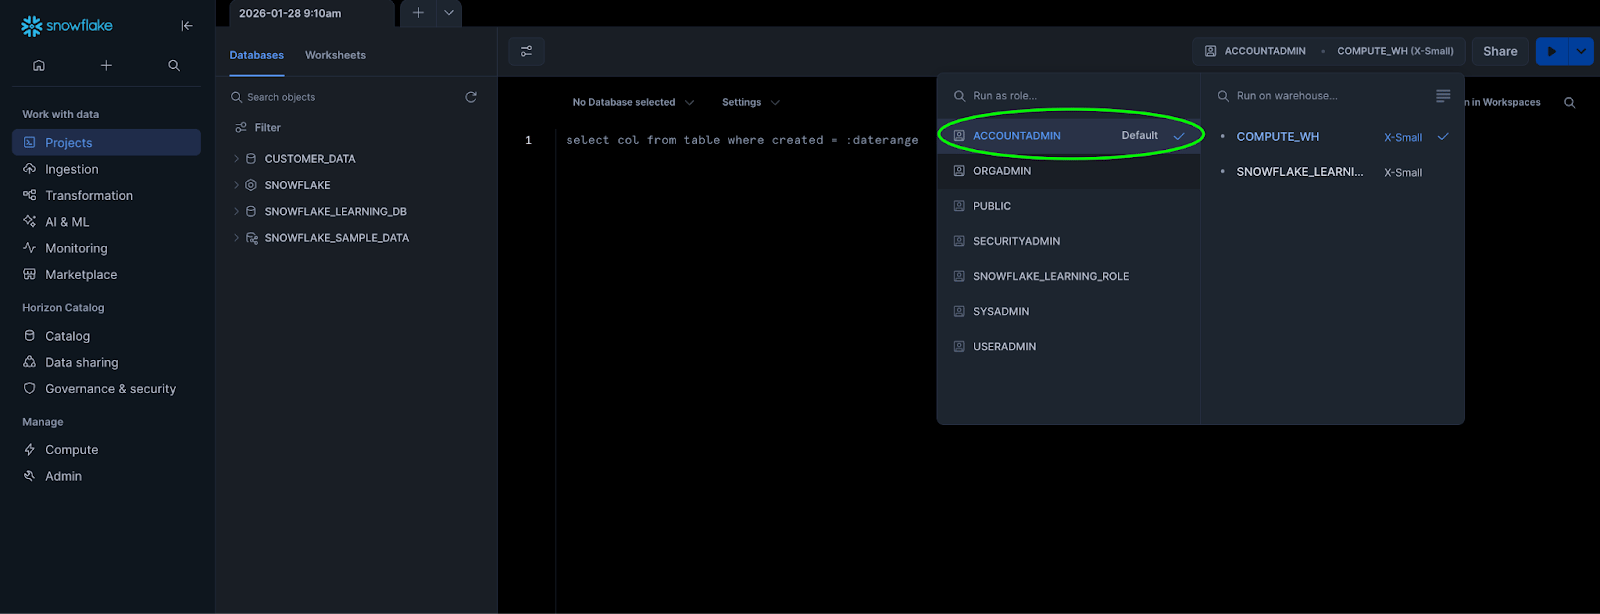
- Select a Warehouse for compute resources
- Optionally select a Database and Schema context
-
Place the cursor on the statement and click the Run button (or press
Cmd+Enteron Mac /Ctrl+Enteron Windows)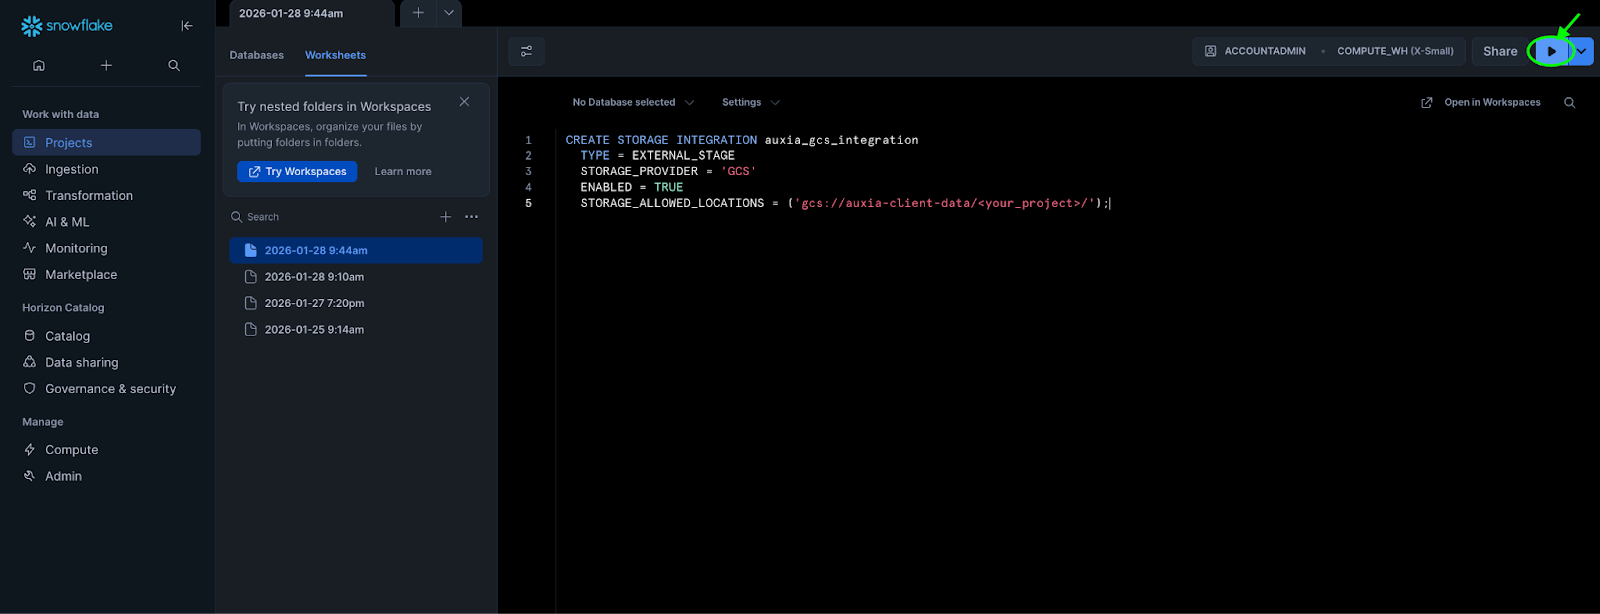
- To run all statements, select all text first
5. Required Actions
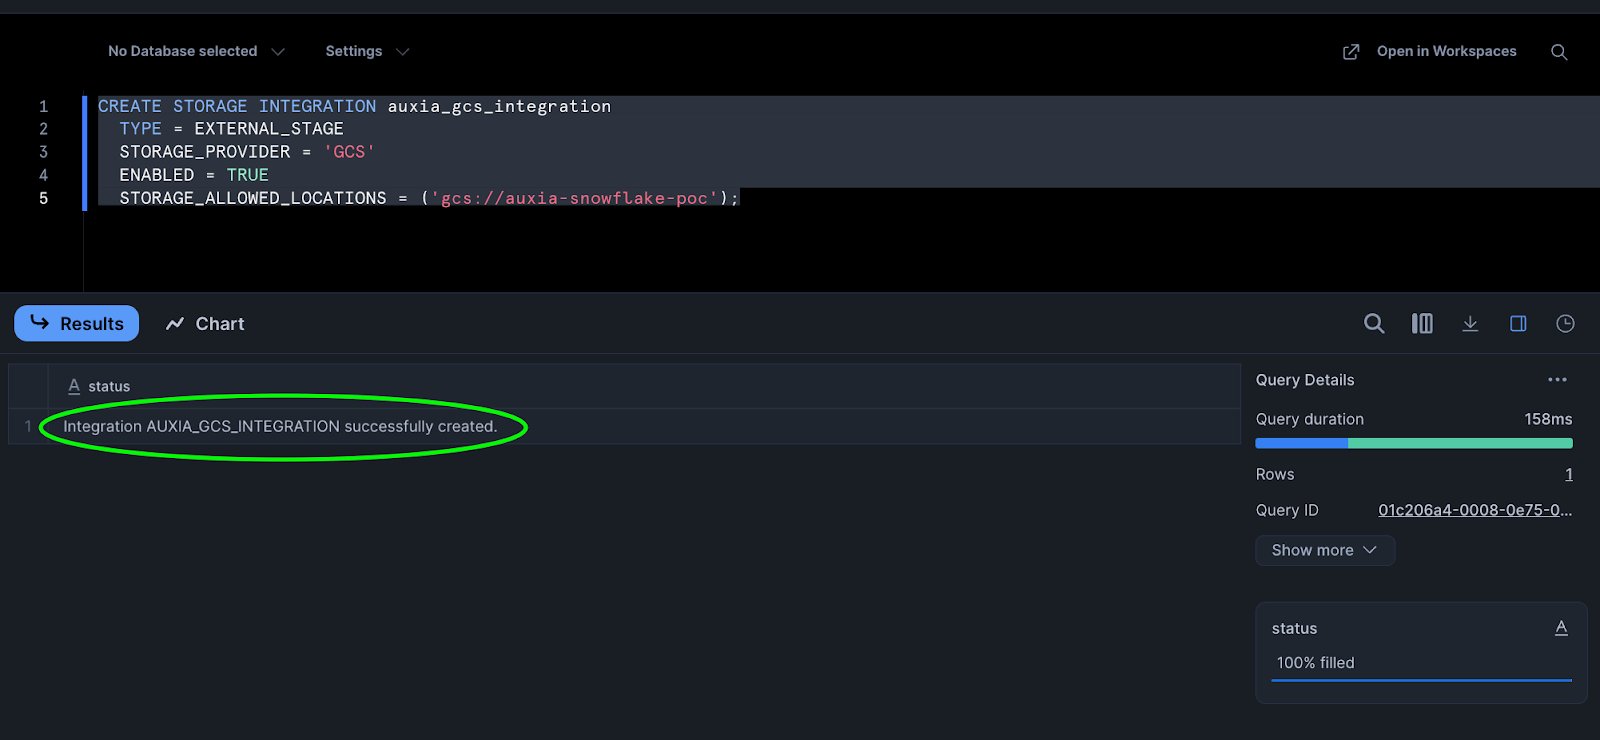
Step 1: Create a Storage Integration
GCS bucket paths copied from the Google Cloud Console use the
gs:// prefix. Snowflake requires the gcs:// prefix instead.ACCOUNTADMIN role selected:
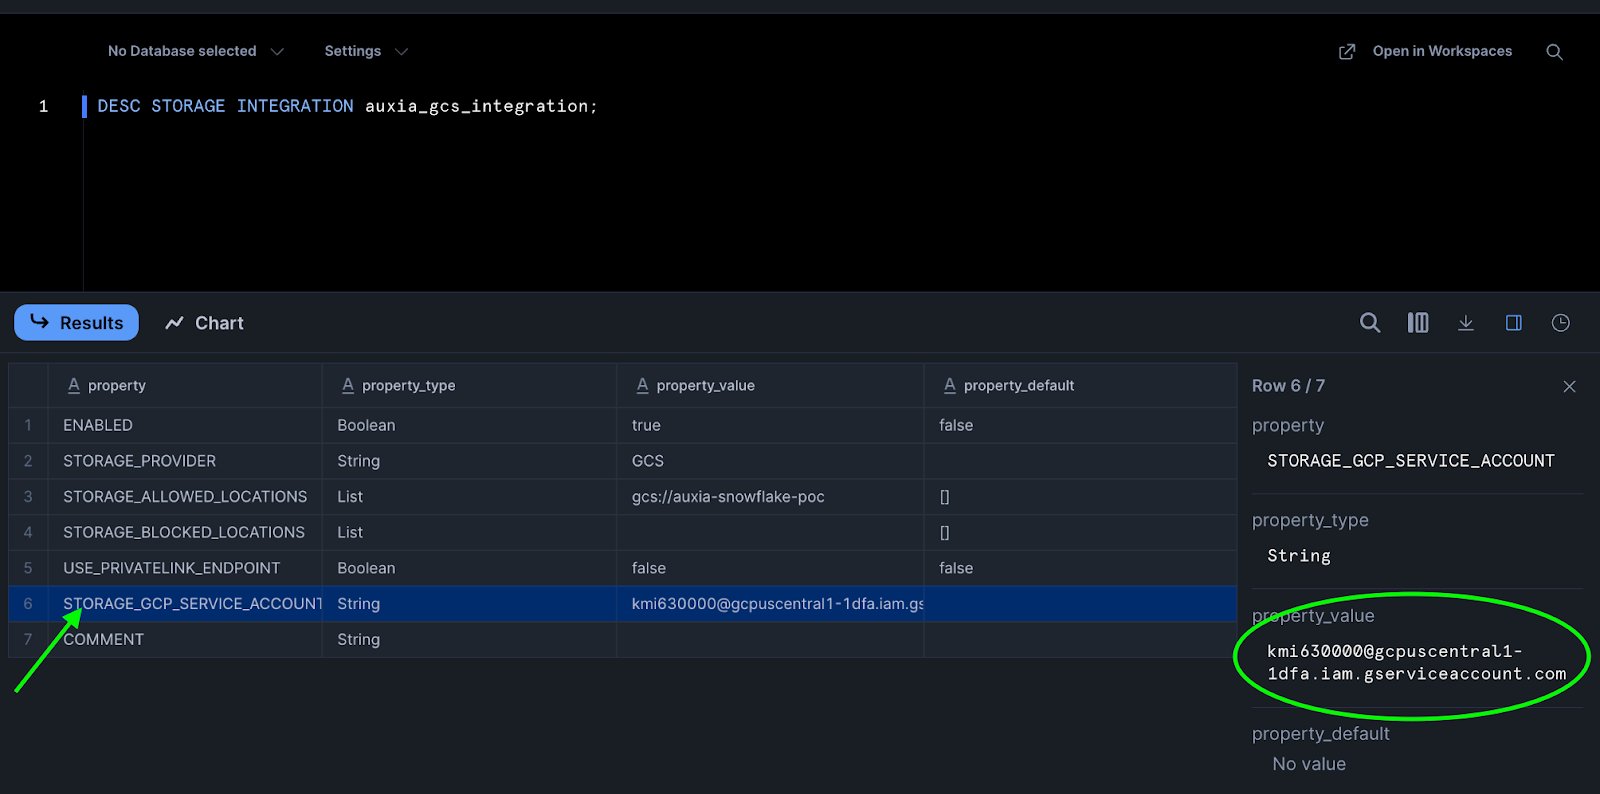
Step 2: Retrieve and Send the Service Account to Auxia
Run the following SQL to retrieve the Snowflake-generated GCP service account:STORAGE_GCP_SERVICE_ACCOUNT row and copy its property_value:
Step 3: Set Up Scheduled Export
Once Auxia confirms write access is granted, set up a scheduled export to deliver data to the GCS bucket in the format specified below. Cost considerations:- Warehouse compute: Each task execution consumes Snowflake credits based on warehouse size and runtime. Billing is per-second with a 1-minute minimum per execution.
- Data egress: Snowflake charges per-byte egress fees for cross-region or cross-cloud data transfers. Same-region transfers are free.
- Recommendation: Use an appropriately sized warehouse (e.g., X-Small for small datasets) and consider export frequency based on data volume.
File Format
- Parquet (required) — must be specified explicitly via
FILE_FORMAT = (TYPE = PARQUET)in the export query. Snowflake uses Snappy compression by default for Parquet files.
Partitioning
Data must be partitioned by UTC date (dt=YYYY-MM-DD/) or UTC date and hour (dt=YYYY-MM-DD/hr=HH/). Each folder should contain data that was added to Snowflake during that UTC hour (for hourly exports) or UTC day (for daily exports).
Daily partitioning:
Data Requirements
- Treat exported files as immutable — do not modify or delete after writing
- Use UTC timestamps for all partitioning
export_timestamp) that records when each row was inserted into Snowflake, and filter based on that column to extract data for the corresponding UTC time period. The exact filtering logic will depend on your data structure and pipeline.
Below are Snowflake Task examples to help you get started. The schedule, filtering logic, and export paths shown here are illustrative — modify them to fit your data pipeline.
Sample: Hourly Export
Sample: Daily Export
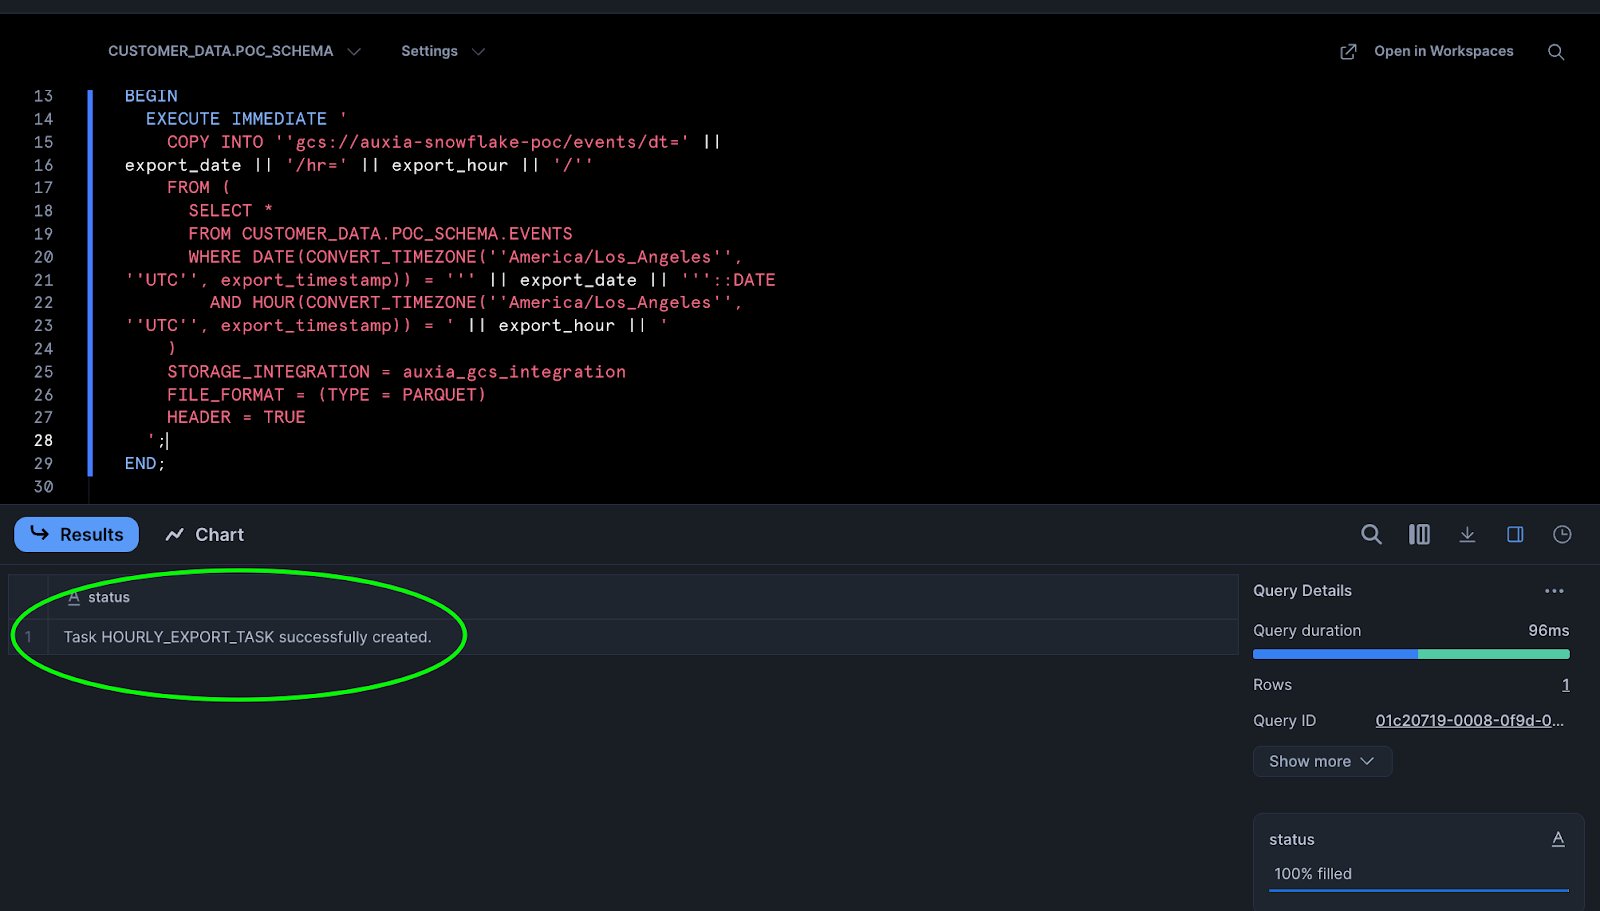
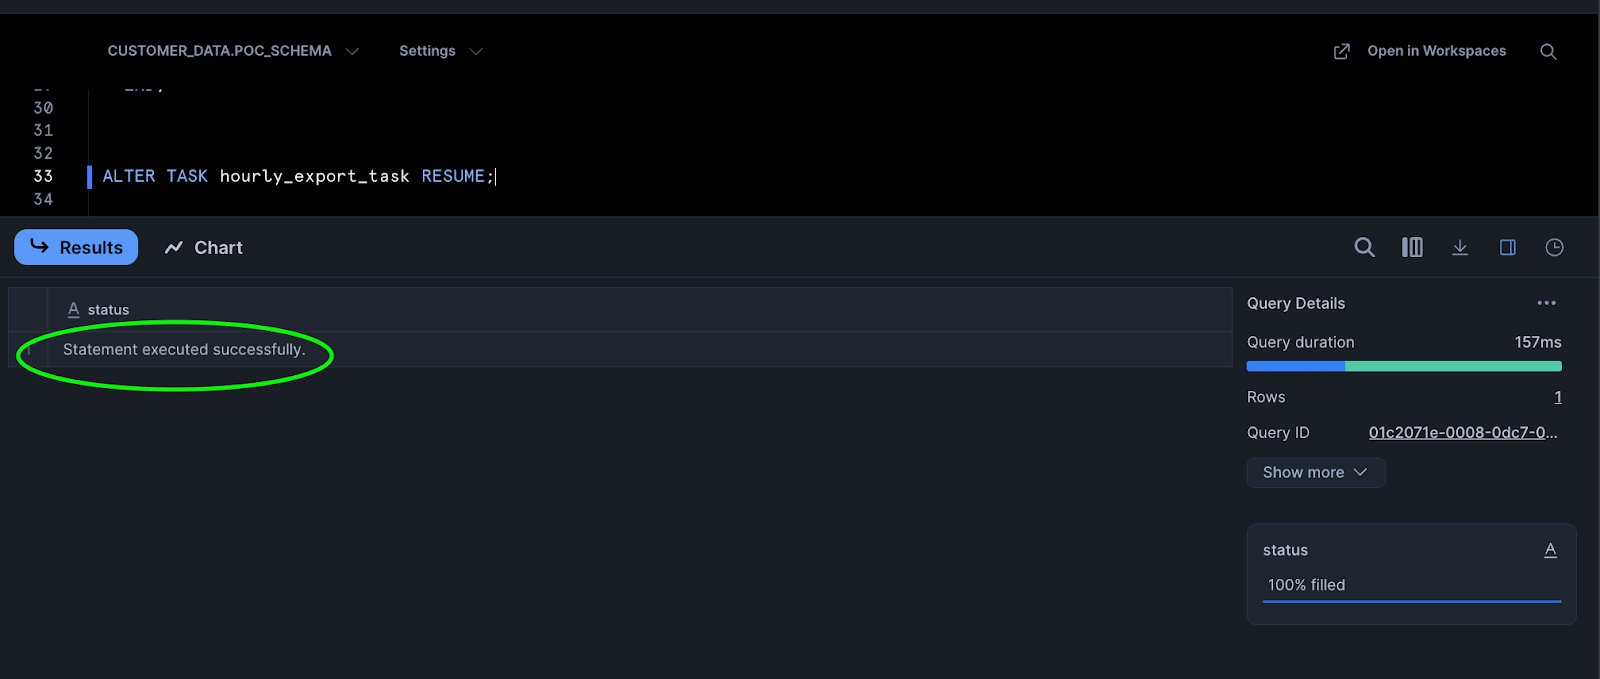
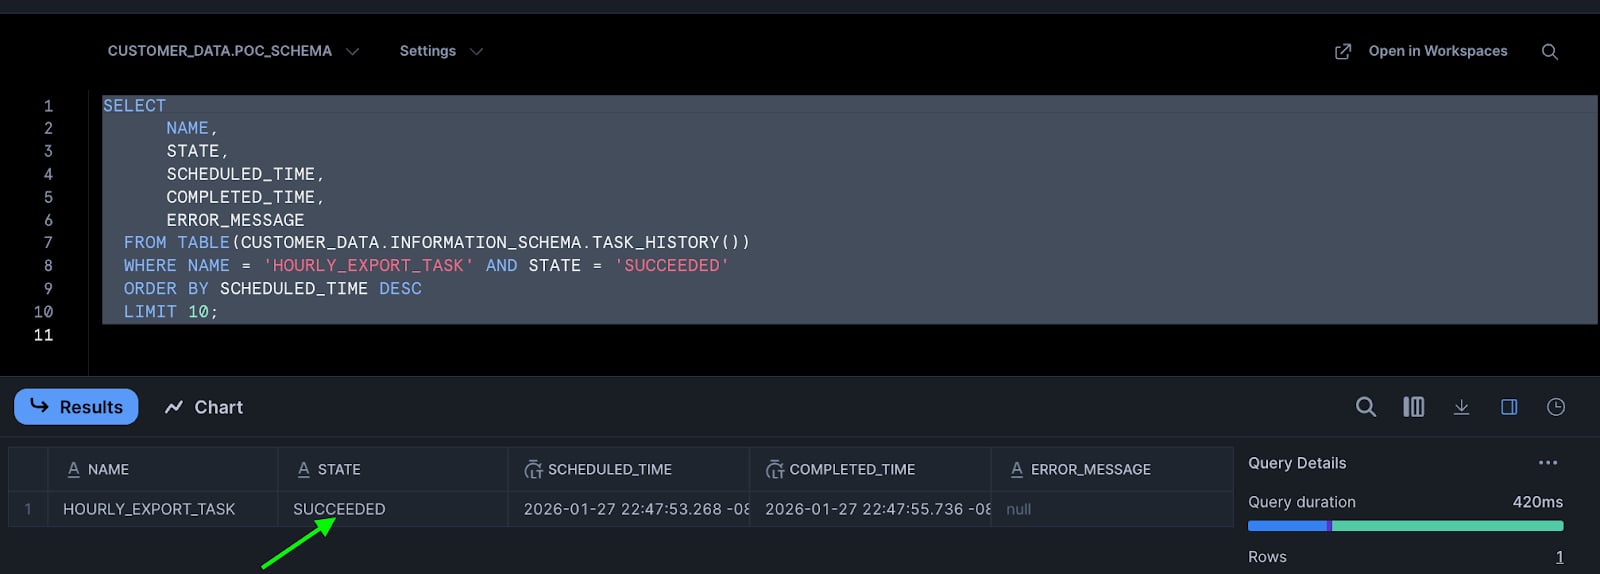
6. Monitoring Task Execution
To verify the export task is running correctly, use the following SQL commands. List all tasks: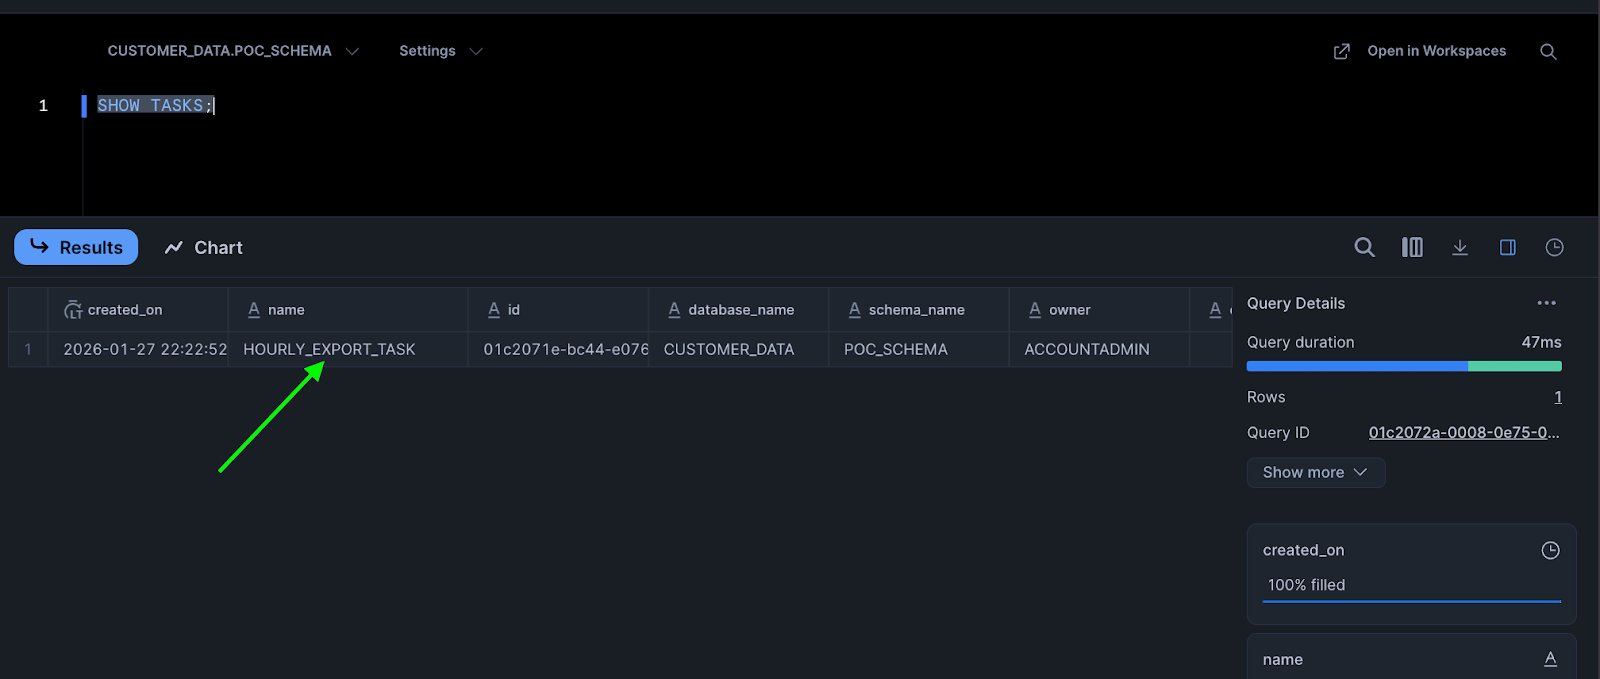
SUCCEEDED in the STATE column:
7. Confirm with Auxia
Once the export task is running and verified, notify Auxia and confirm:- Export frequency (hourly or daily)
- Table(s) being exported
8. Recommended Practices
- Use Parquet format — Snowflake compresses Parquet files with Snappy by default
- Partition by UTC date (daily) or UTC date/hour (hourly)
- Ensure immutability — once a file is written, it should not be modified or deleted
- Use UTC timestamps — all partitioning should be based on UTC time
- Monitor task execution — regularly check task history for failures or delays