
QA Page User Guide
Overview
The QA Page allows users to configure a specific user with a treatment. The Auxia system ensures that the configured user consistently receives the assigned treatment.
How to Add QA Users
- Navigate to the QA under manage section.

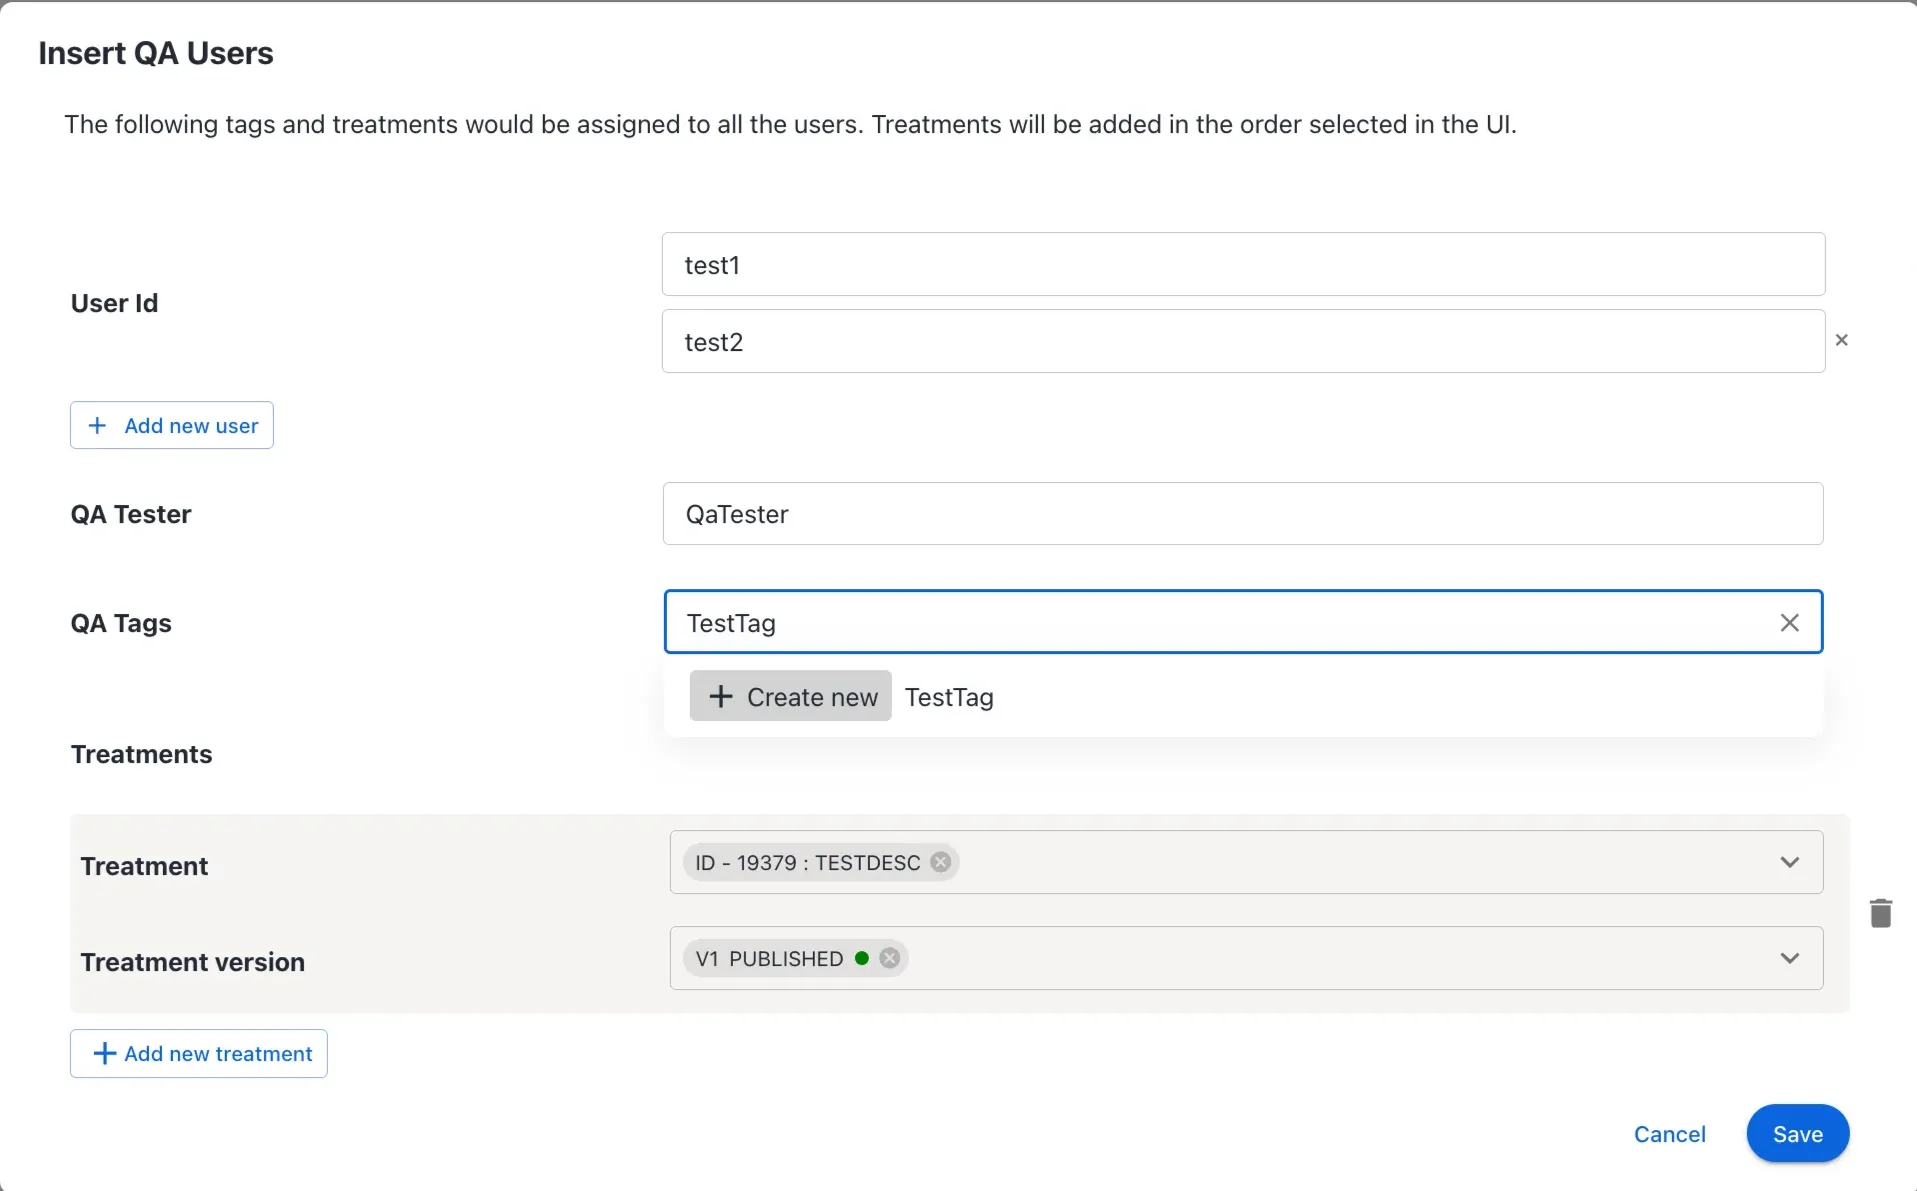
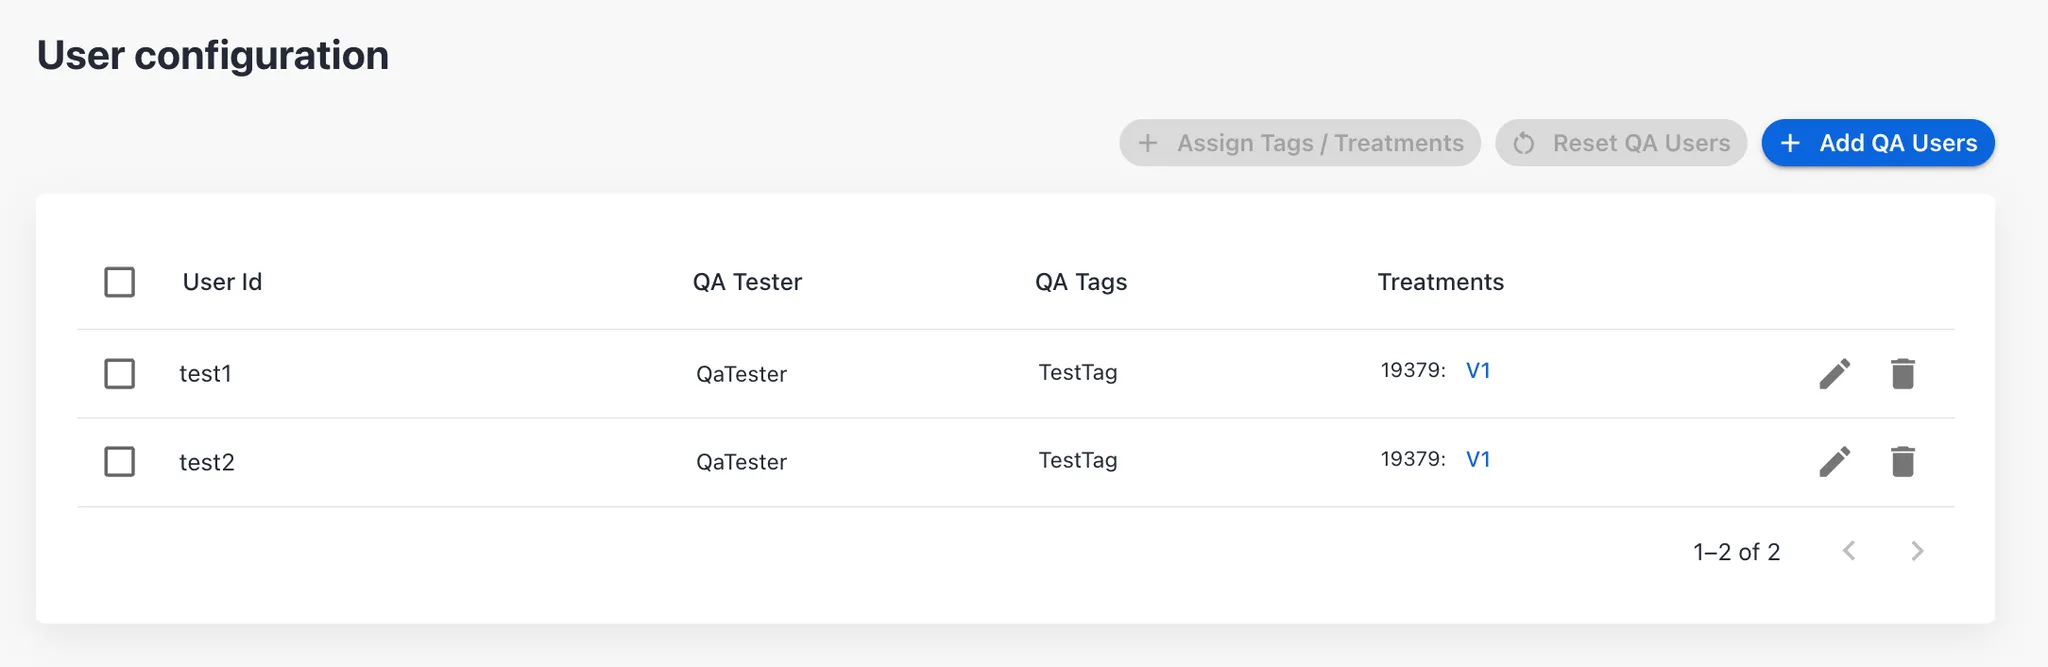
- In the Users Configuration sub-tab, click Add QA Users button to add the QA users. Each unique User ID entered will be saved with the configuration specified in the dialog box.
- Enter the User ID
- Click +Add new user to add additional User IDs
- Add the QA tester's name—the user responsible for testing the Treatments. This field may be left blank if not applicable
- Select the QA Tags from the dropdown if present. Tags serve the purpose of grouping QA users into buckets
- Tags can be left blank if not required. To create a new tag:
- Enter the name of the new tag and click the +Create new button to save it
- Assign Treatments to the QA users. Treatments will be assigned to each user in the order they are selected in the UI
- Save the configuration
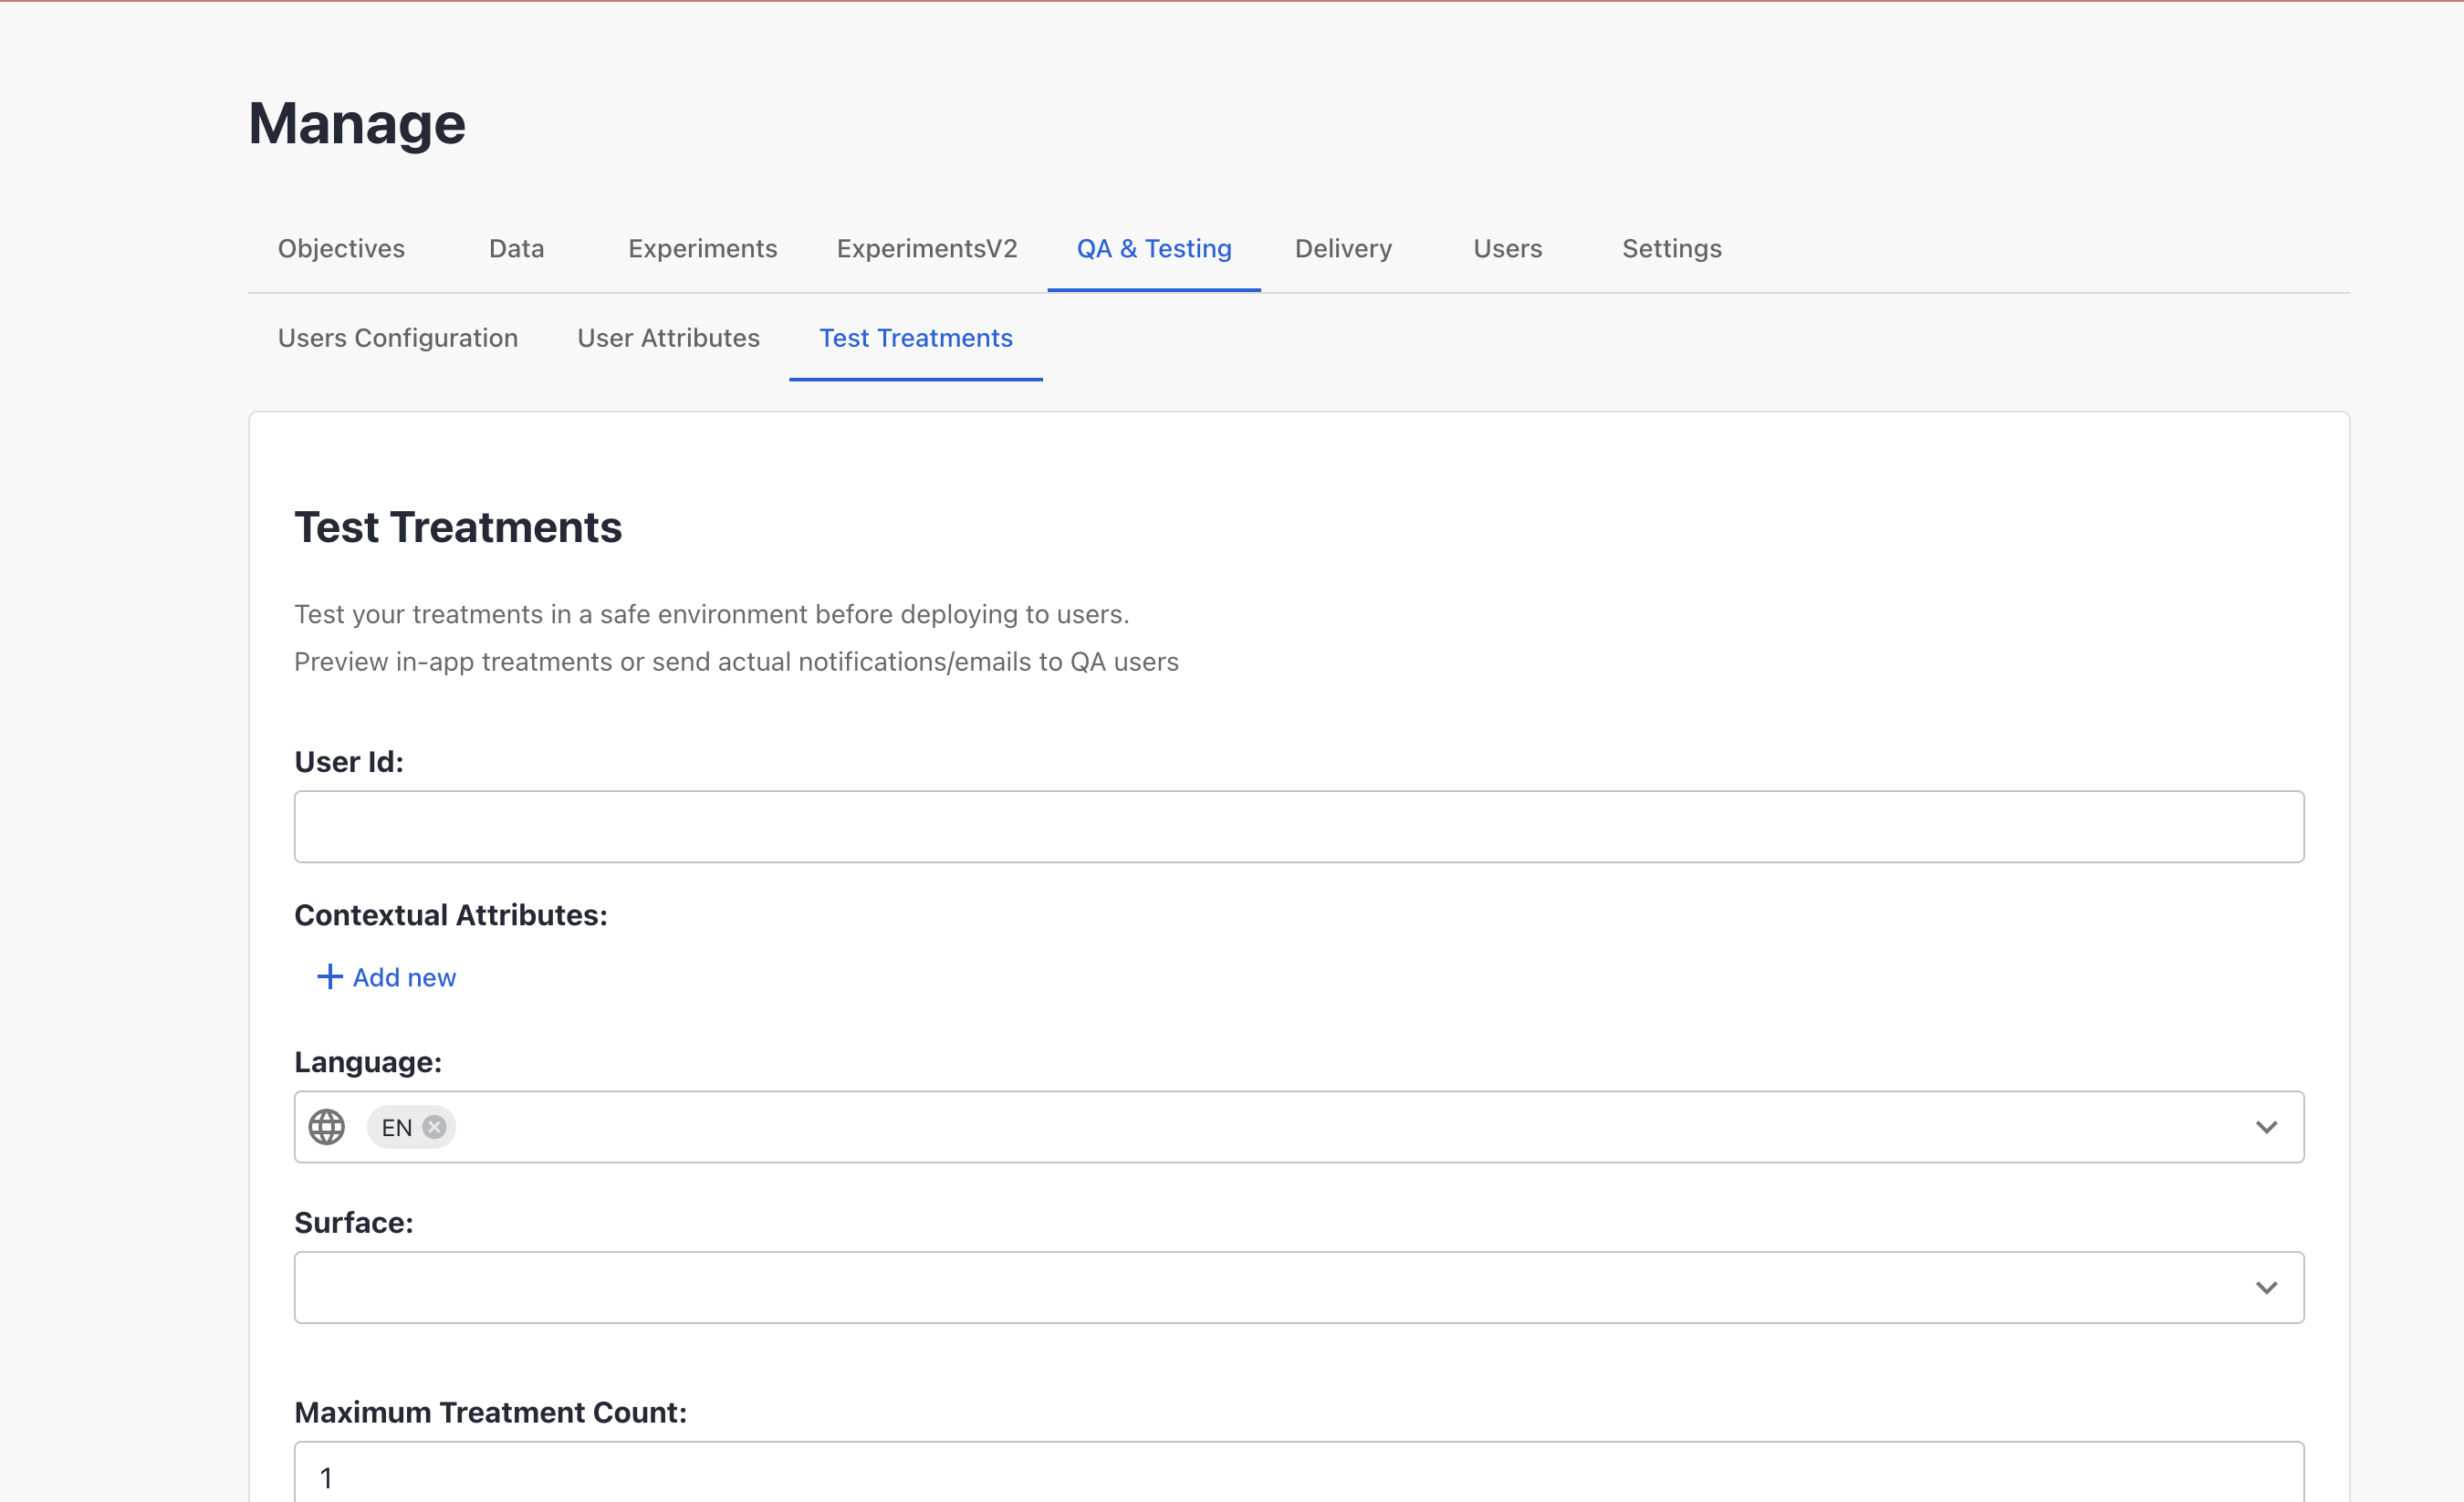
How to Test Treatments
Once a QA user is added, you can validate the treatments assigned to the user in the Test Treatments sub-tab. The page consists of two main sections: a configuration area at the top, and a Testing Details section below for displaying the results.
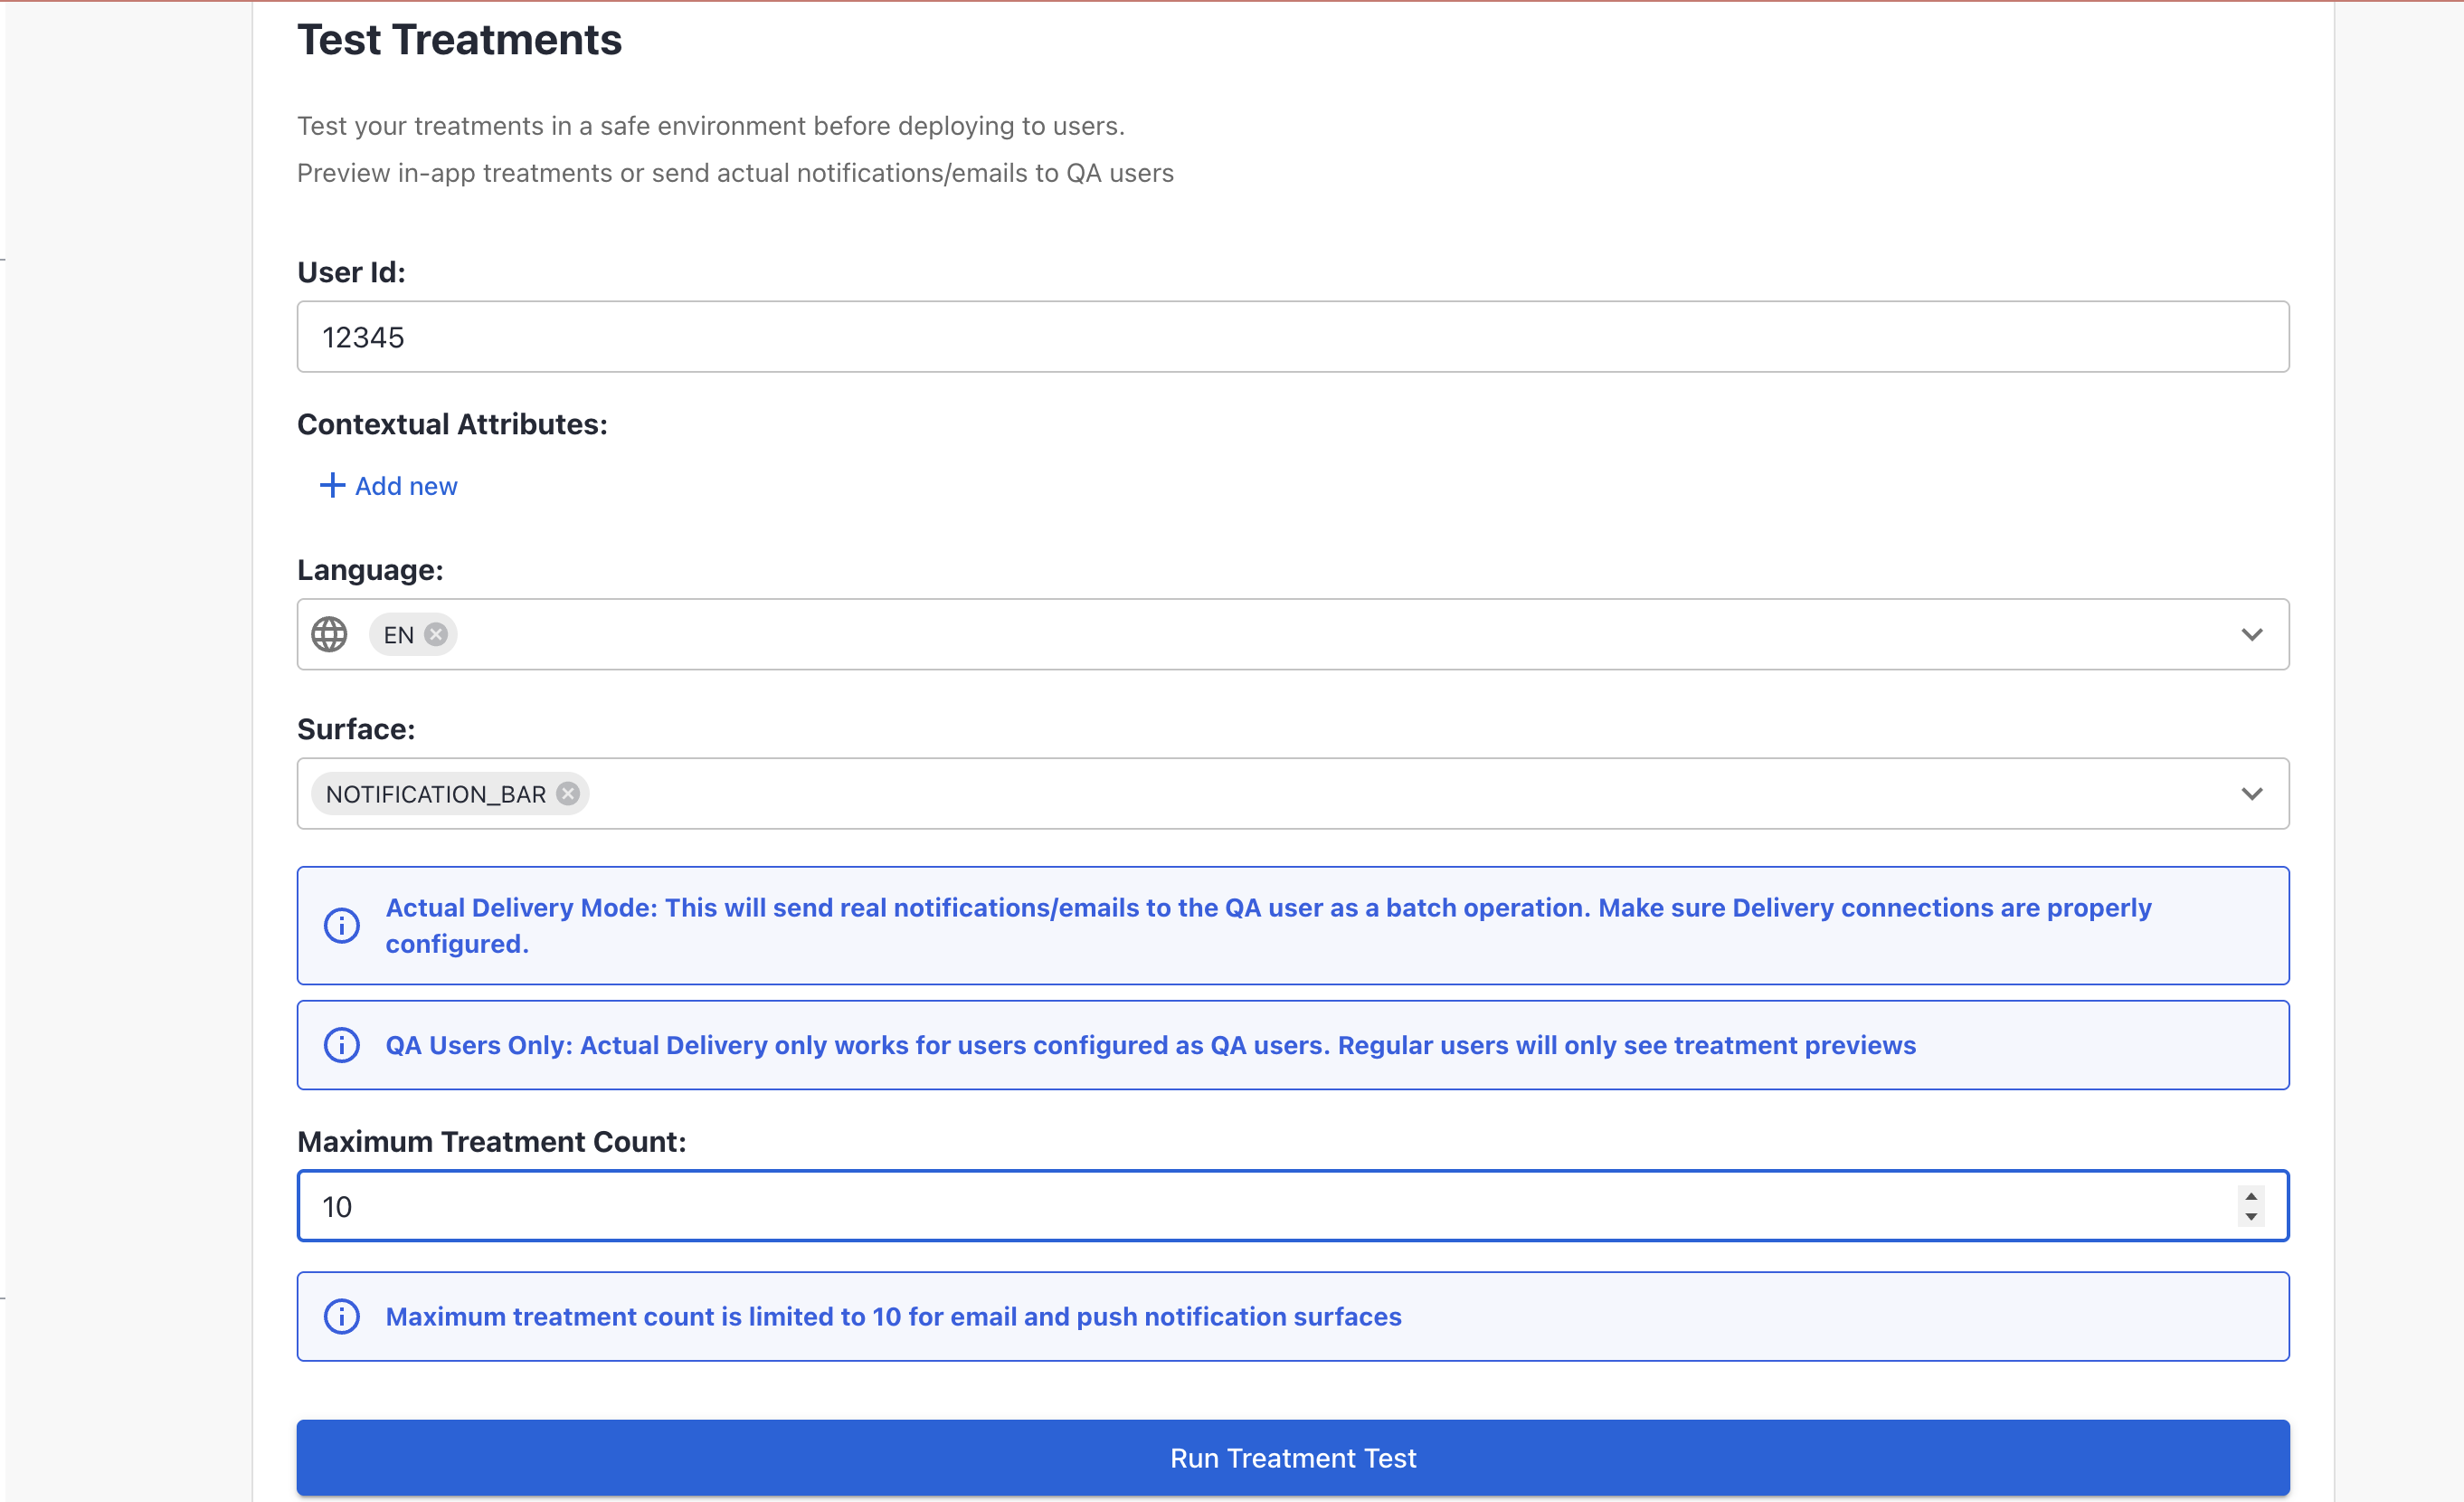
- Enter the required details in the top Test Treatments card to configure the test.
- User ID
- Contextual Attributes
- Language
- Surface
- Maximum Treatment Count
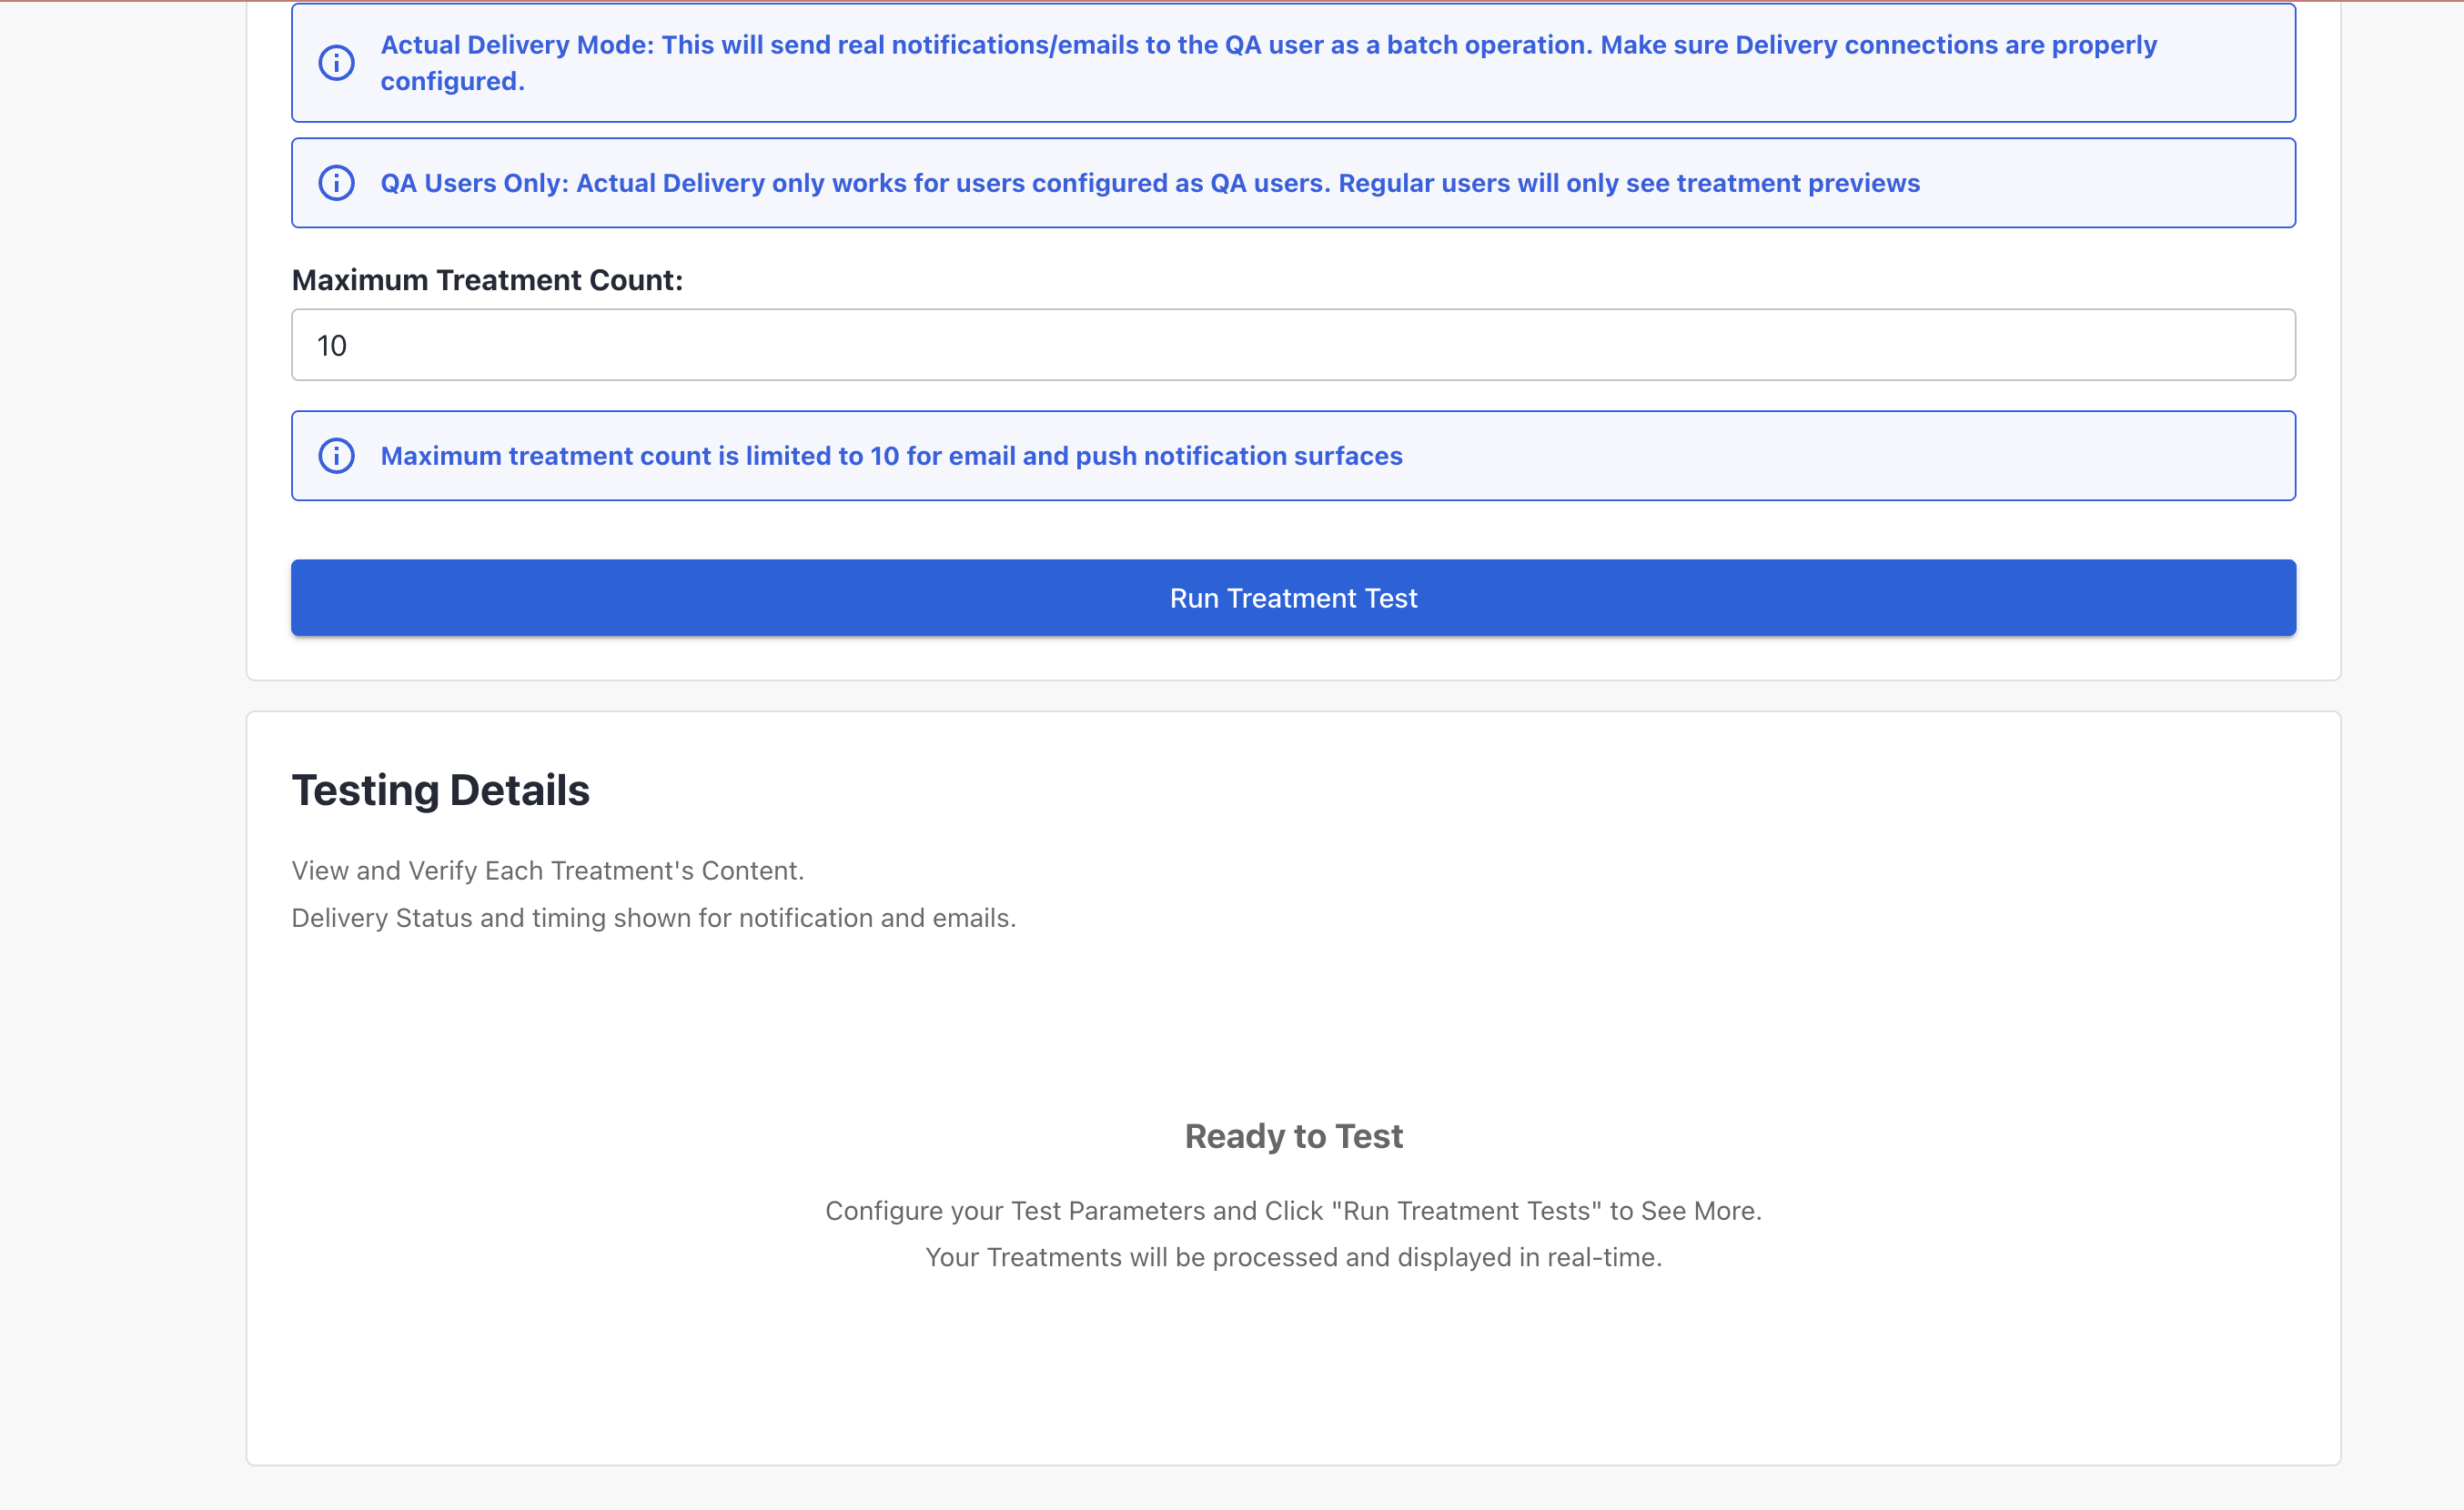
- Based on the selected surface, the UI will provide context-specific guidance—especially for those that support actual delivery, such as push notifications or emails
When NOTIFICATION_BAR or MAIL_BOX is selected, two blue info boxes appear. These indicate that real delivery will be attempted for QA users, while regular users will receive treatment previews only.
A warning appears if the Maximum Treatment Count is set higher than 10. The value is automatically adjusted to comply with the limit.
-
To start the test, click Run Treatment Test if this is your first run, or Run New Test if you have previously run tests.
-
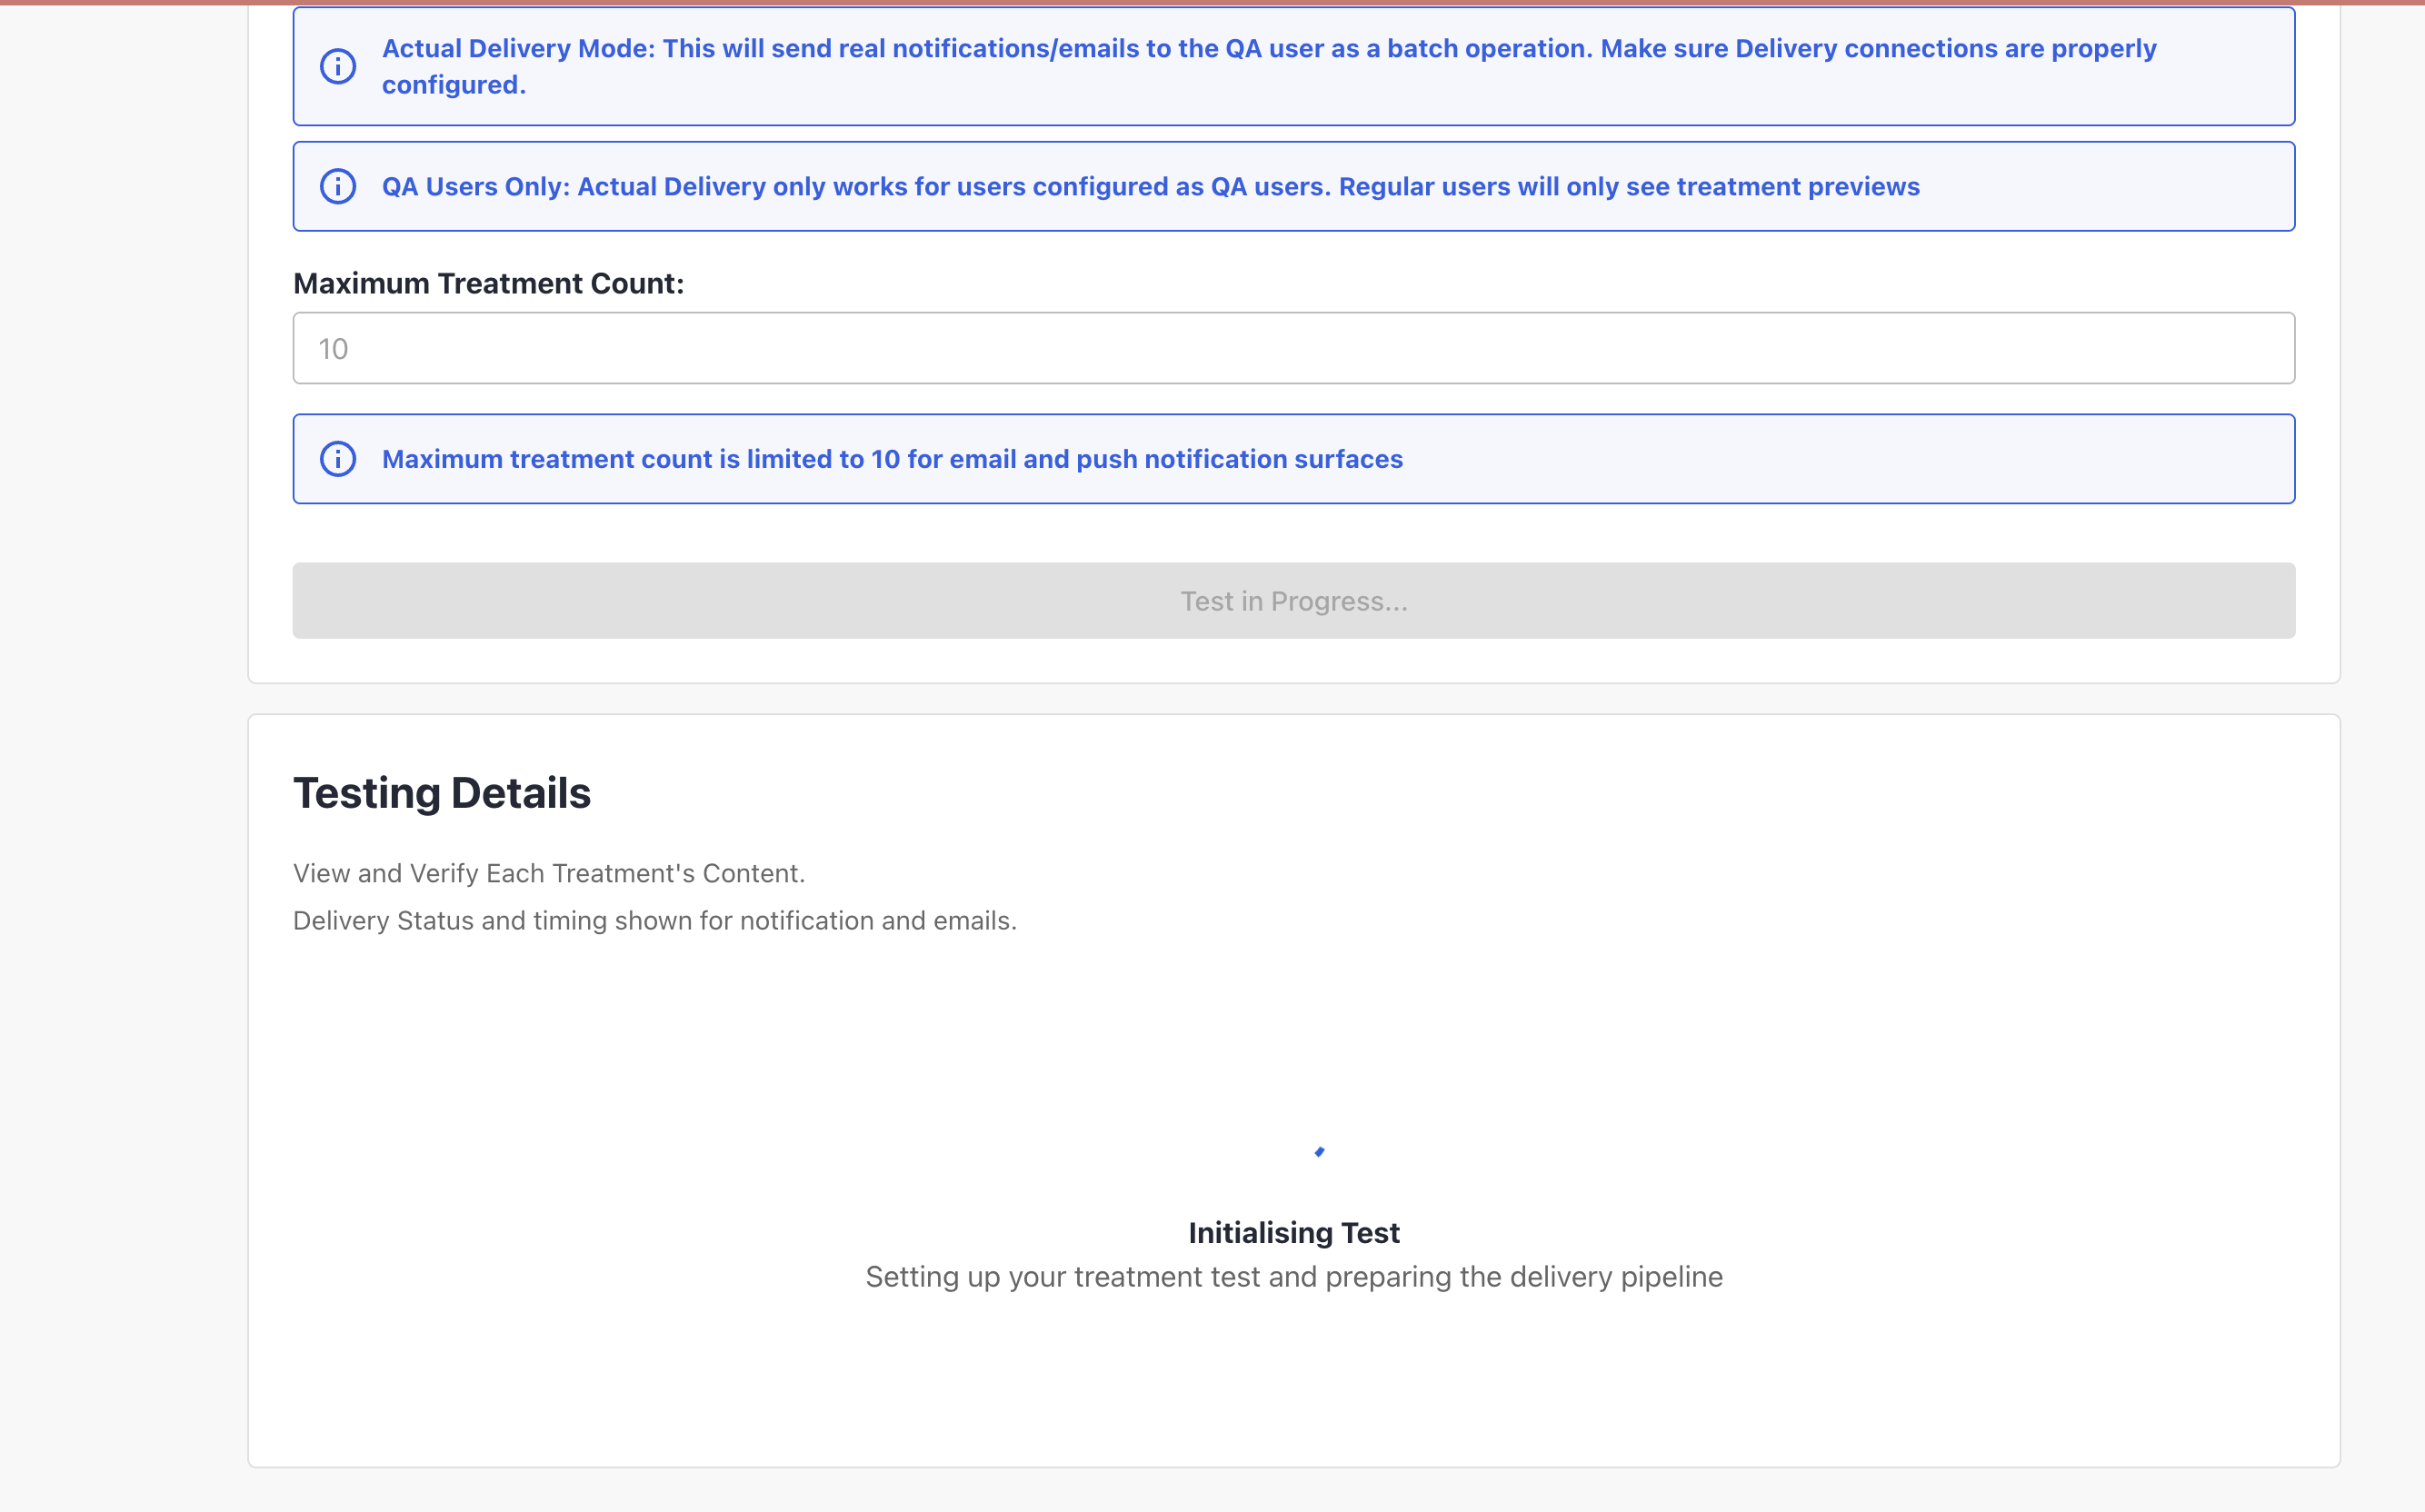
The results are displayed in the Testing Details card, which progresses through three distinct states:
-
Initial State: Before any test is triggered, the card shows a “Ready to Test” message.
-
Loading State: Once the test is started, a progress indicator and status message appear while the test is running
-
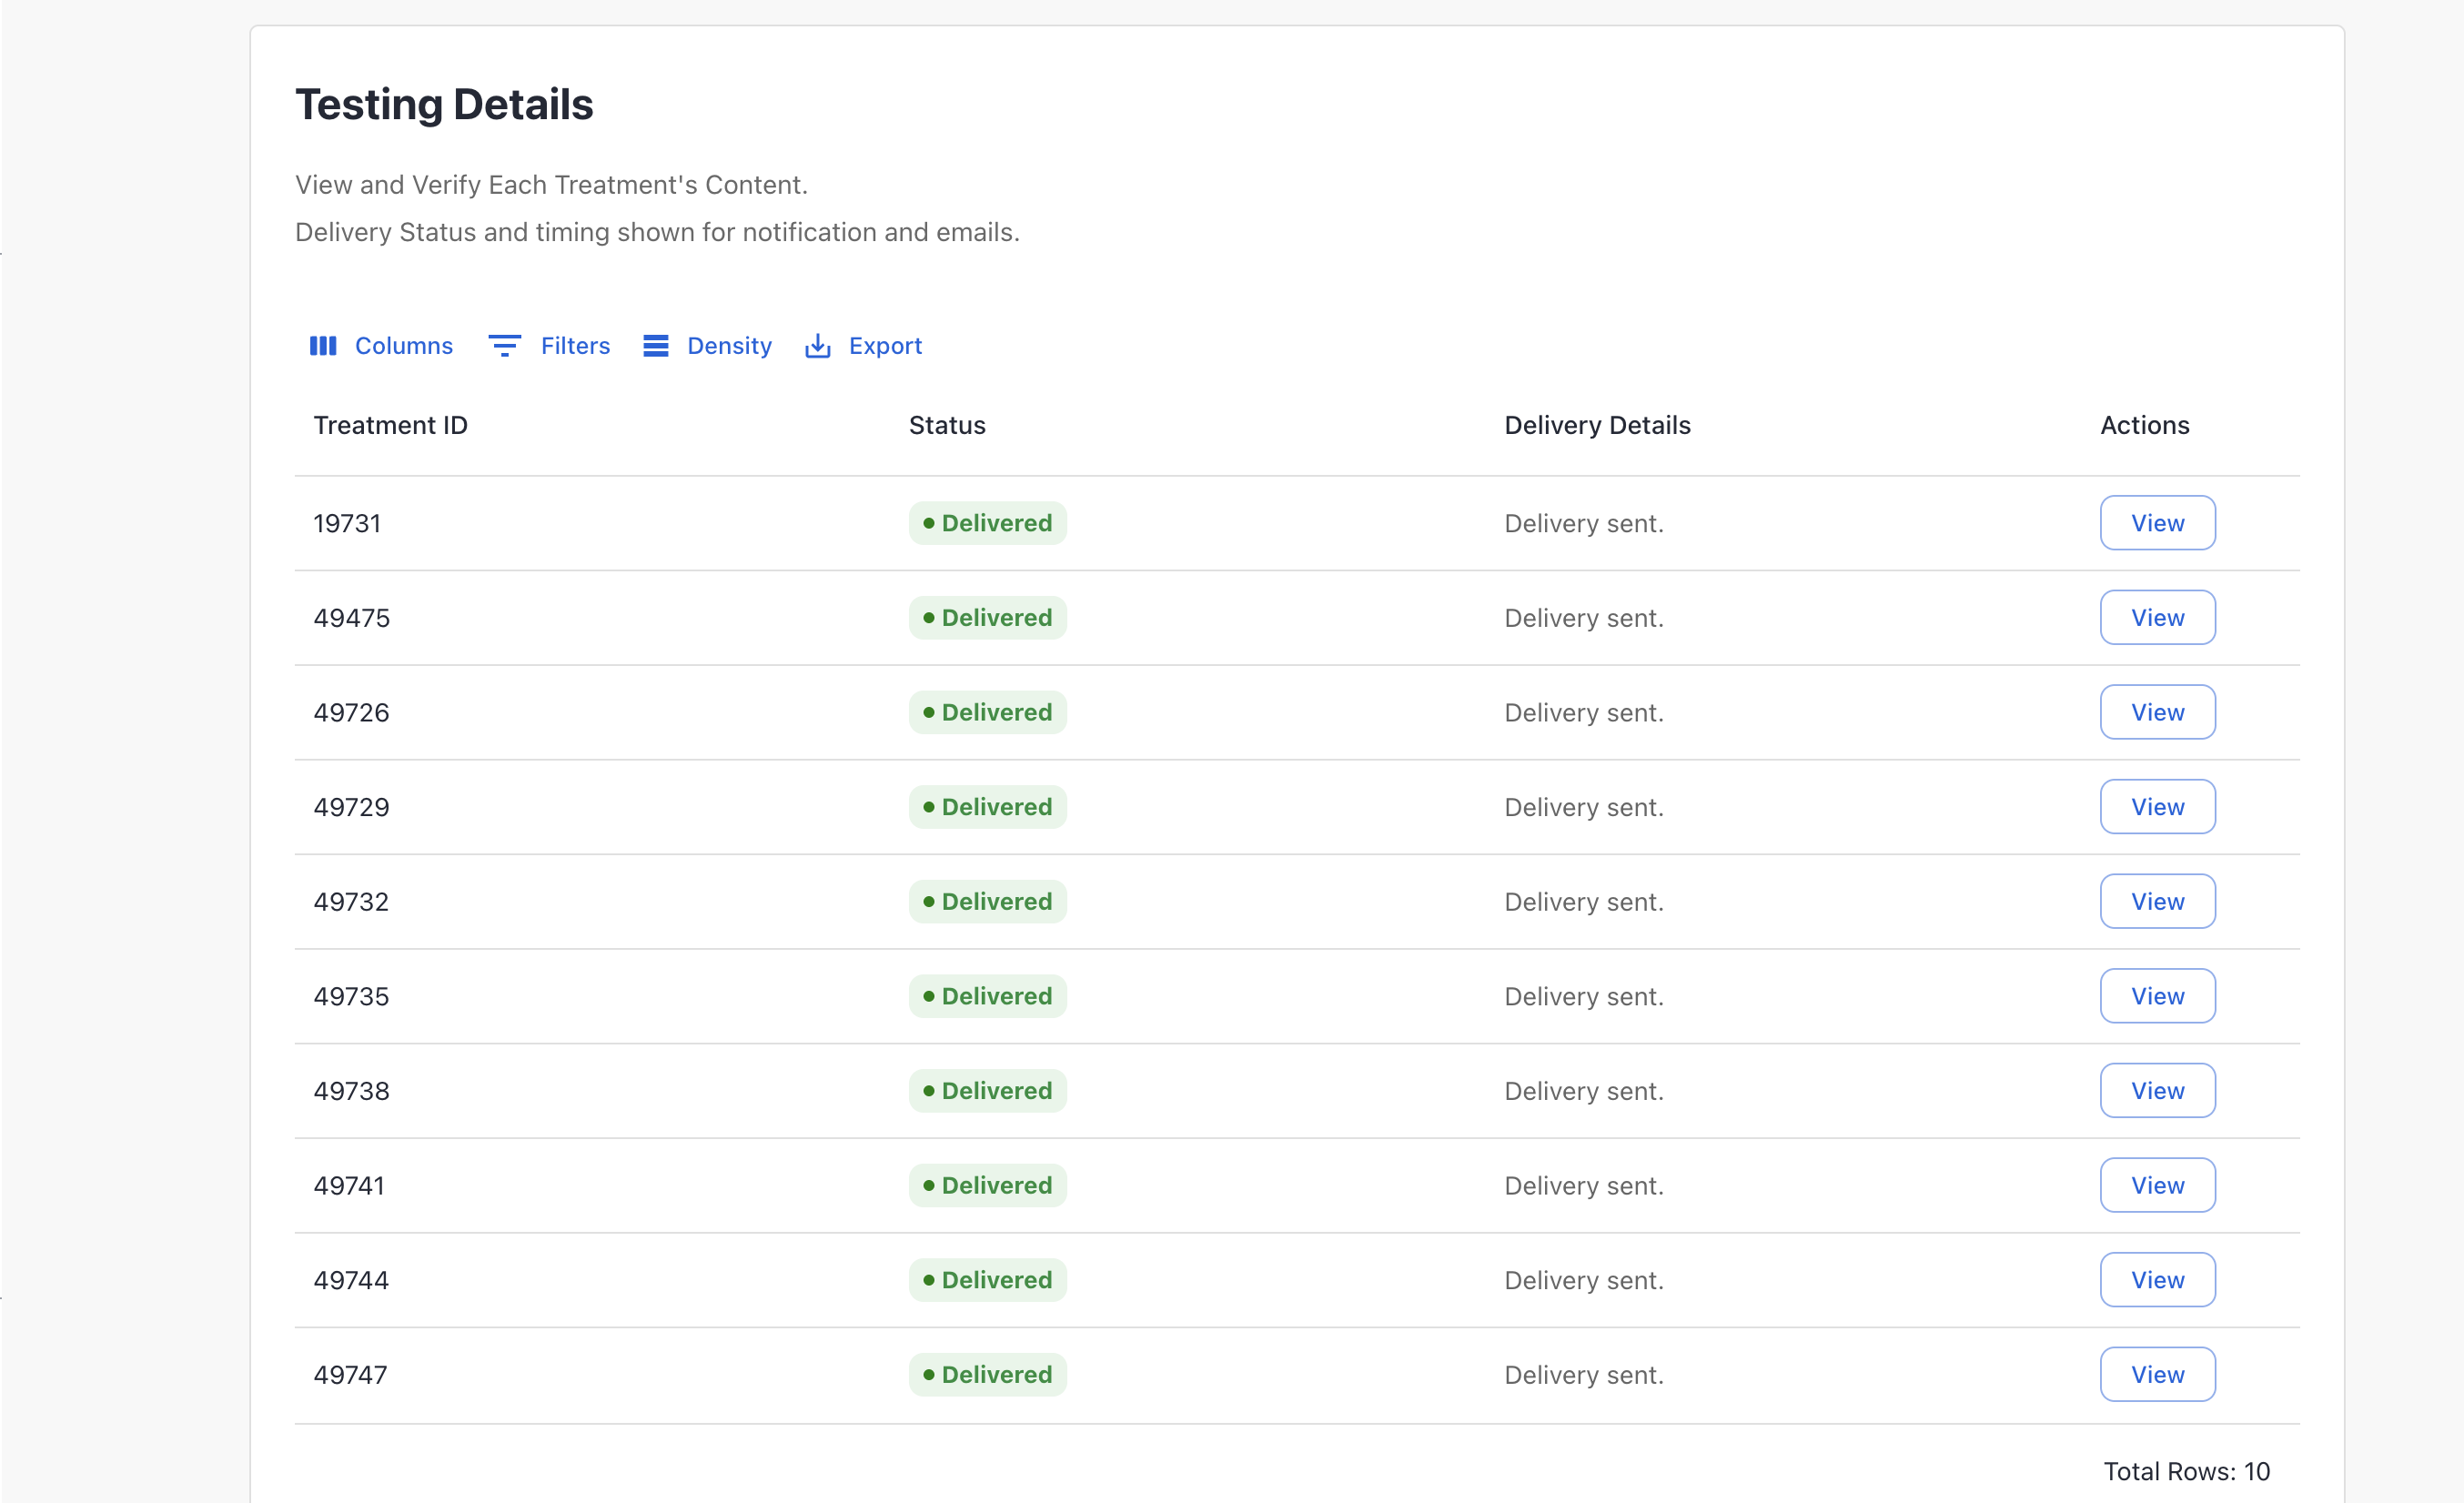
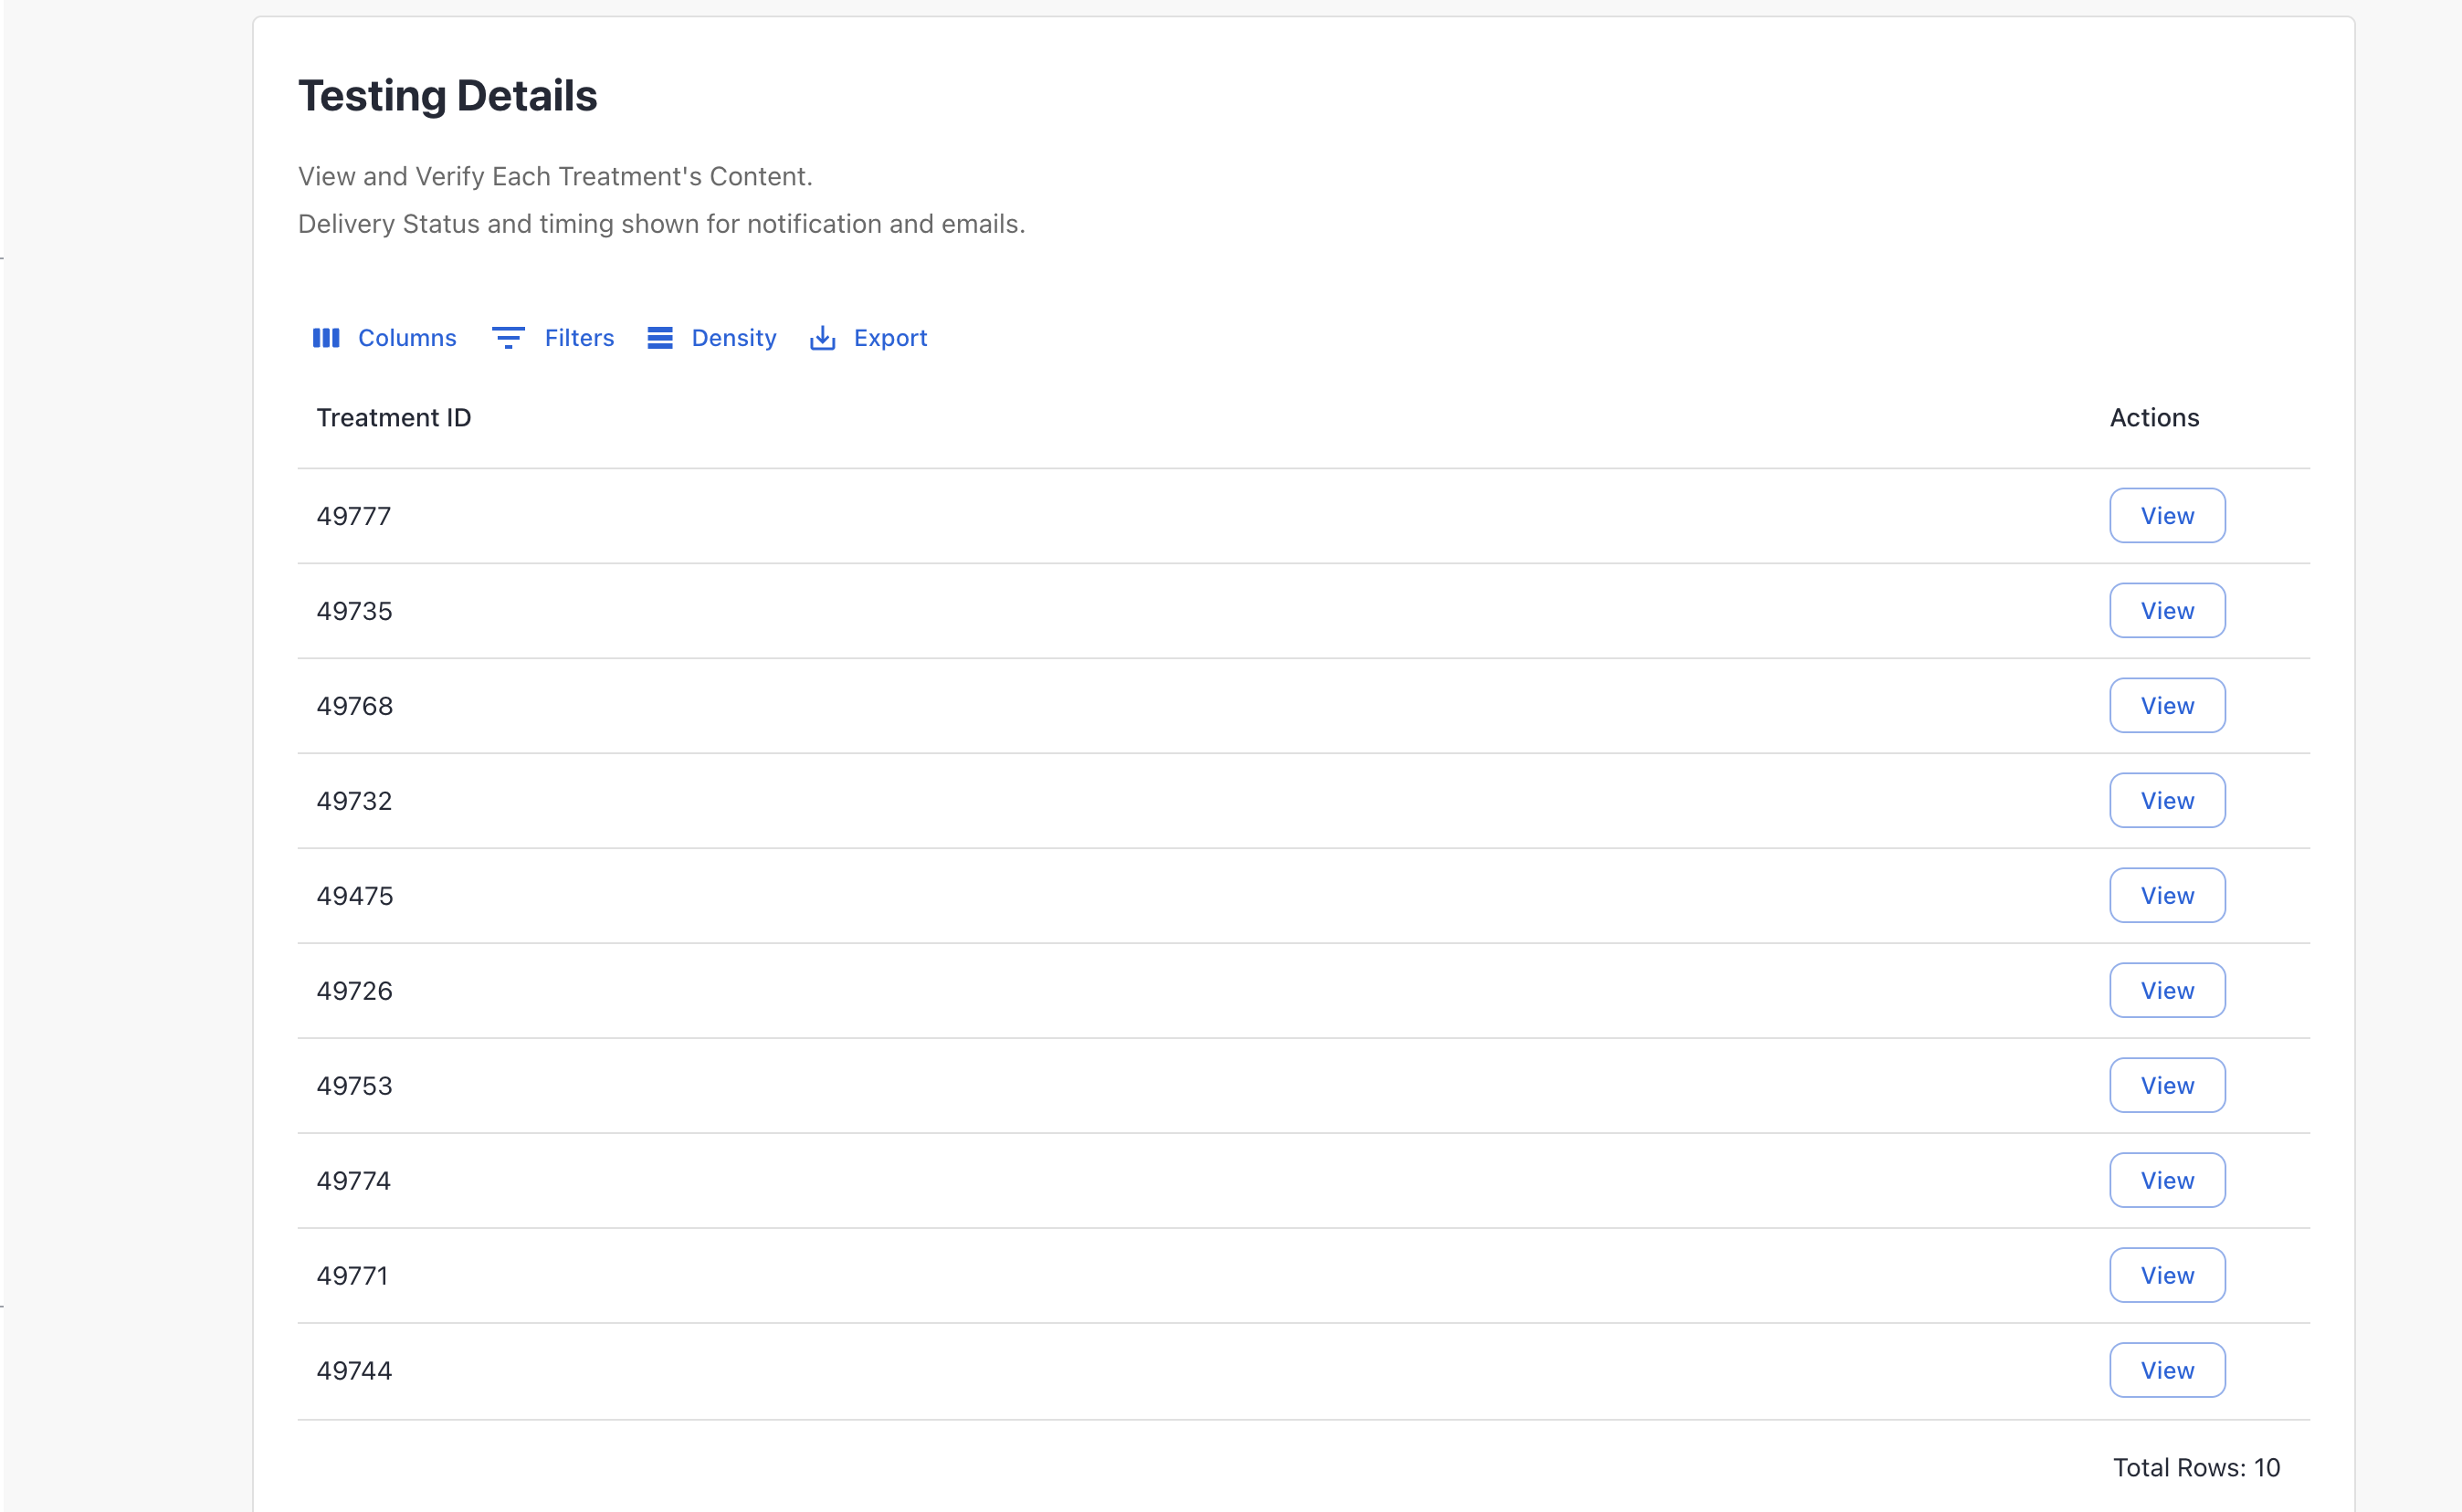
Results State: After the test completes, results are shown in a table. The content of this table varies depending on whether Actual Delivery Mode is enabled:
-
In Actual Delivery Mode, the table includes detailed information such as Status and Delivery Details columns, showing the delivery status for each user and any associated errors.
-
When Actual Delivery Mode is not enabled, the table displays a simplified view with two columns: Treatment ID and View. Clicking the View button allows you to preview the assigned treatment for the user.
-
-
It may take up to 5 minutes for the changes to take effect after treatments are added to a QA user.
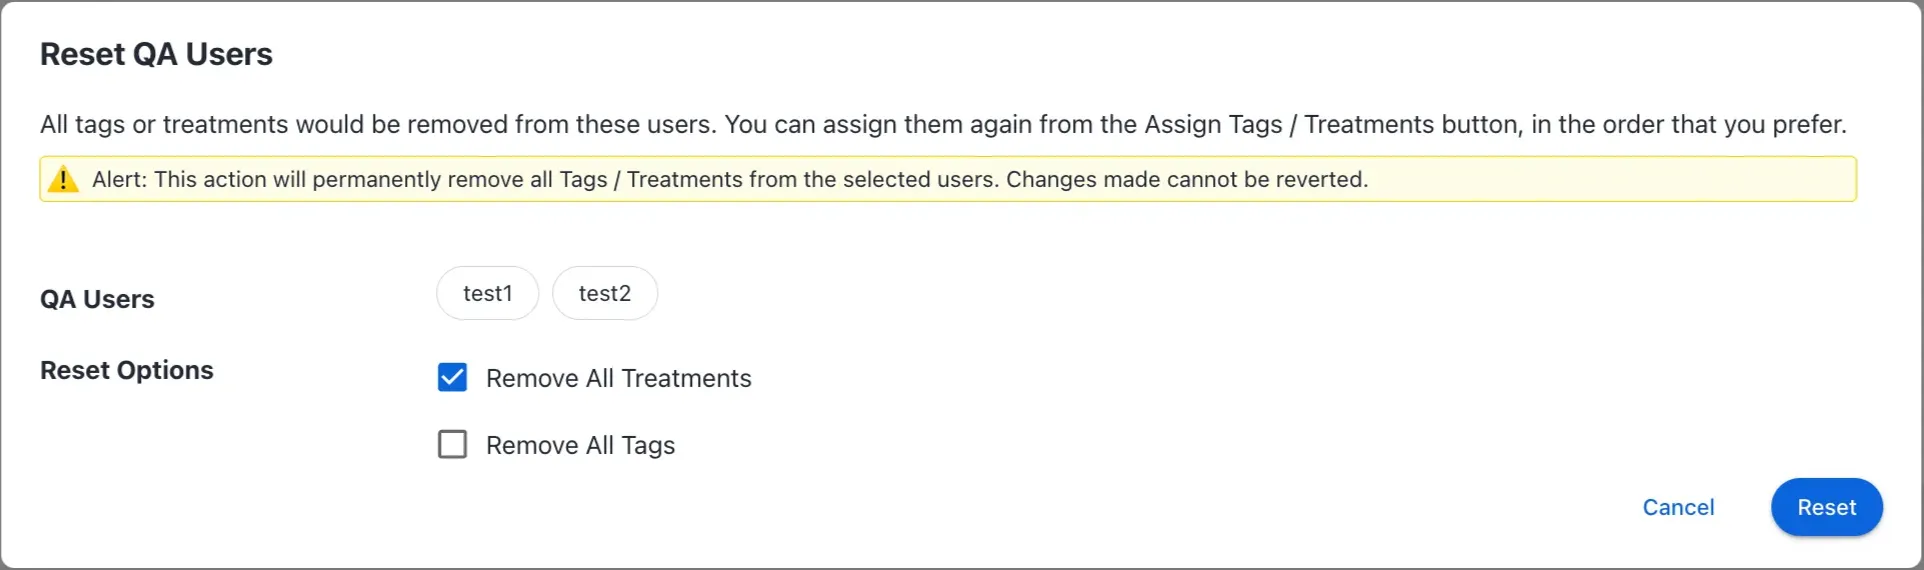
How to Reset QA Users
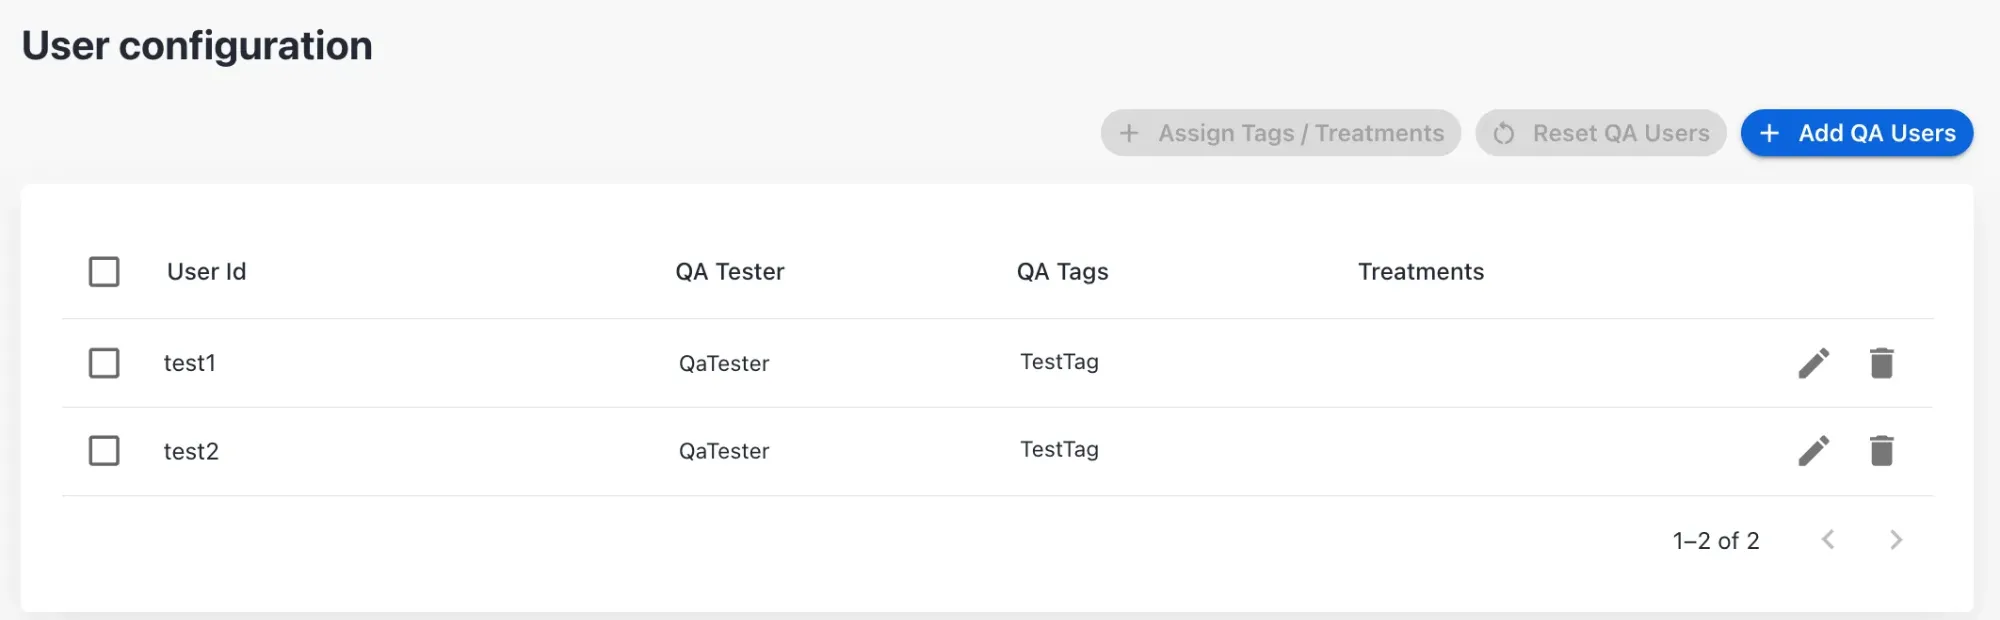
Resetting a QA User removes all associated Tags and/or Treatments from that user.
- Select the QA users to reset their associated Treatments/Tags from the row checkbox. To select all users, use the column header checkbox.
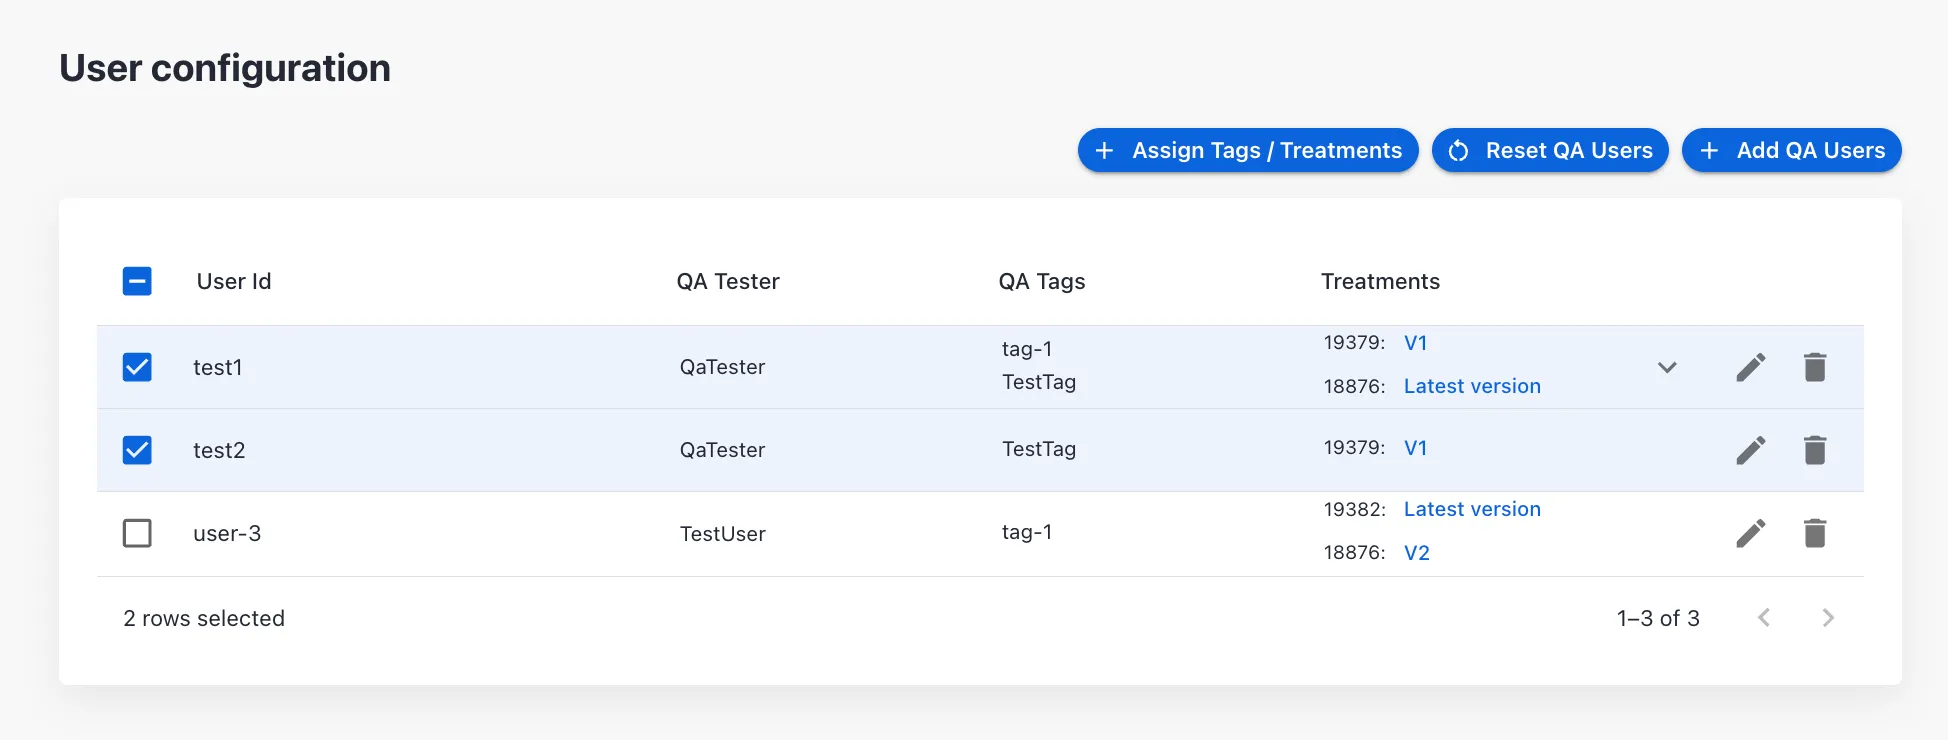
- Click the Reset QA Users button.
- Choose at least one of the Reset Options.
- Click Reset to complete the operation.
Reset operation will remove all the Treatments/Tags from all the users selected. This action cannot be reverted once done. Verify all the User IDs before proceeding to Reset.
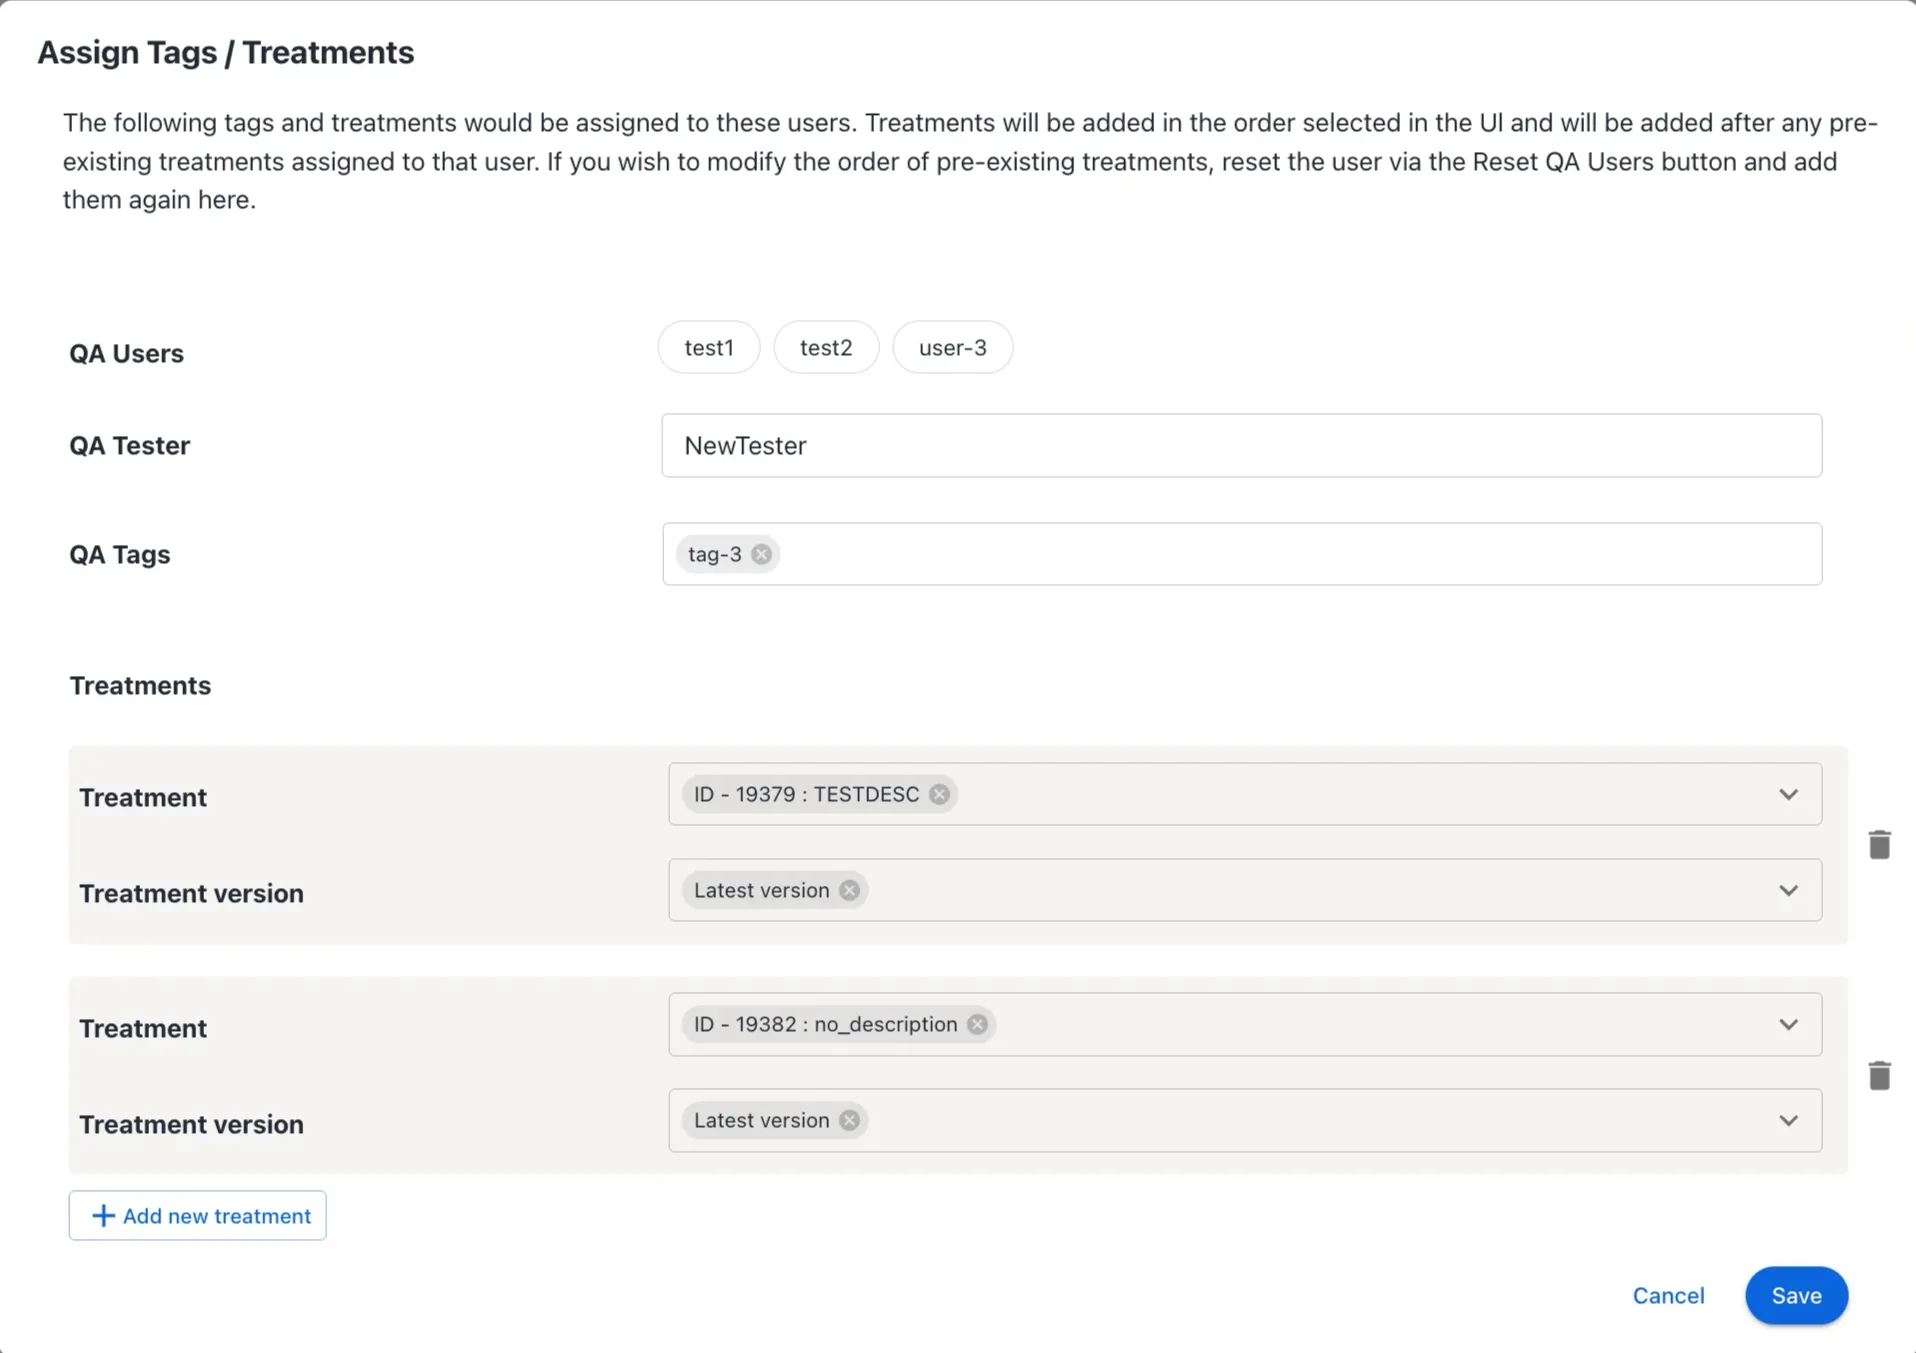
How to Assign Tags/Treatments to QA Users
Assigning Tags and/or Treatments adds the selected Tags/Treatments to the QA User's existing assignments. All selected users will receive the same Treatments and Tags, added after any pre-existing ones.
- Select the QA Users to assign Tags/Treatments from the row checkbox.
- Tip: Use the QA Tags column filter to narrow down the desired users, then select all using the column header checkbox.
- Add the QA Tester name.
- Add the desired Tags and/or Treatments. At least one of them must be added.
- Save the configuration.
- Treatments will be assigned in the order selected in the UI for all the users after any pre-existing Treatments assigned to that User. If some users already have the selected Treatments, they will be reordered based on the order selected in the UI.
- Tags will be appended to the existing Tags for each user. However no ordering exists for Tags.
- If the QA Tester field is left empty, all selected QA users will retain their existing QA tester name.
Auxia currently does not support inserting, resetting, or assigning Treatments and Tags to more than 100 users at a time.
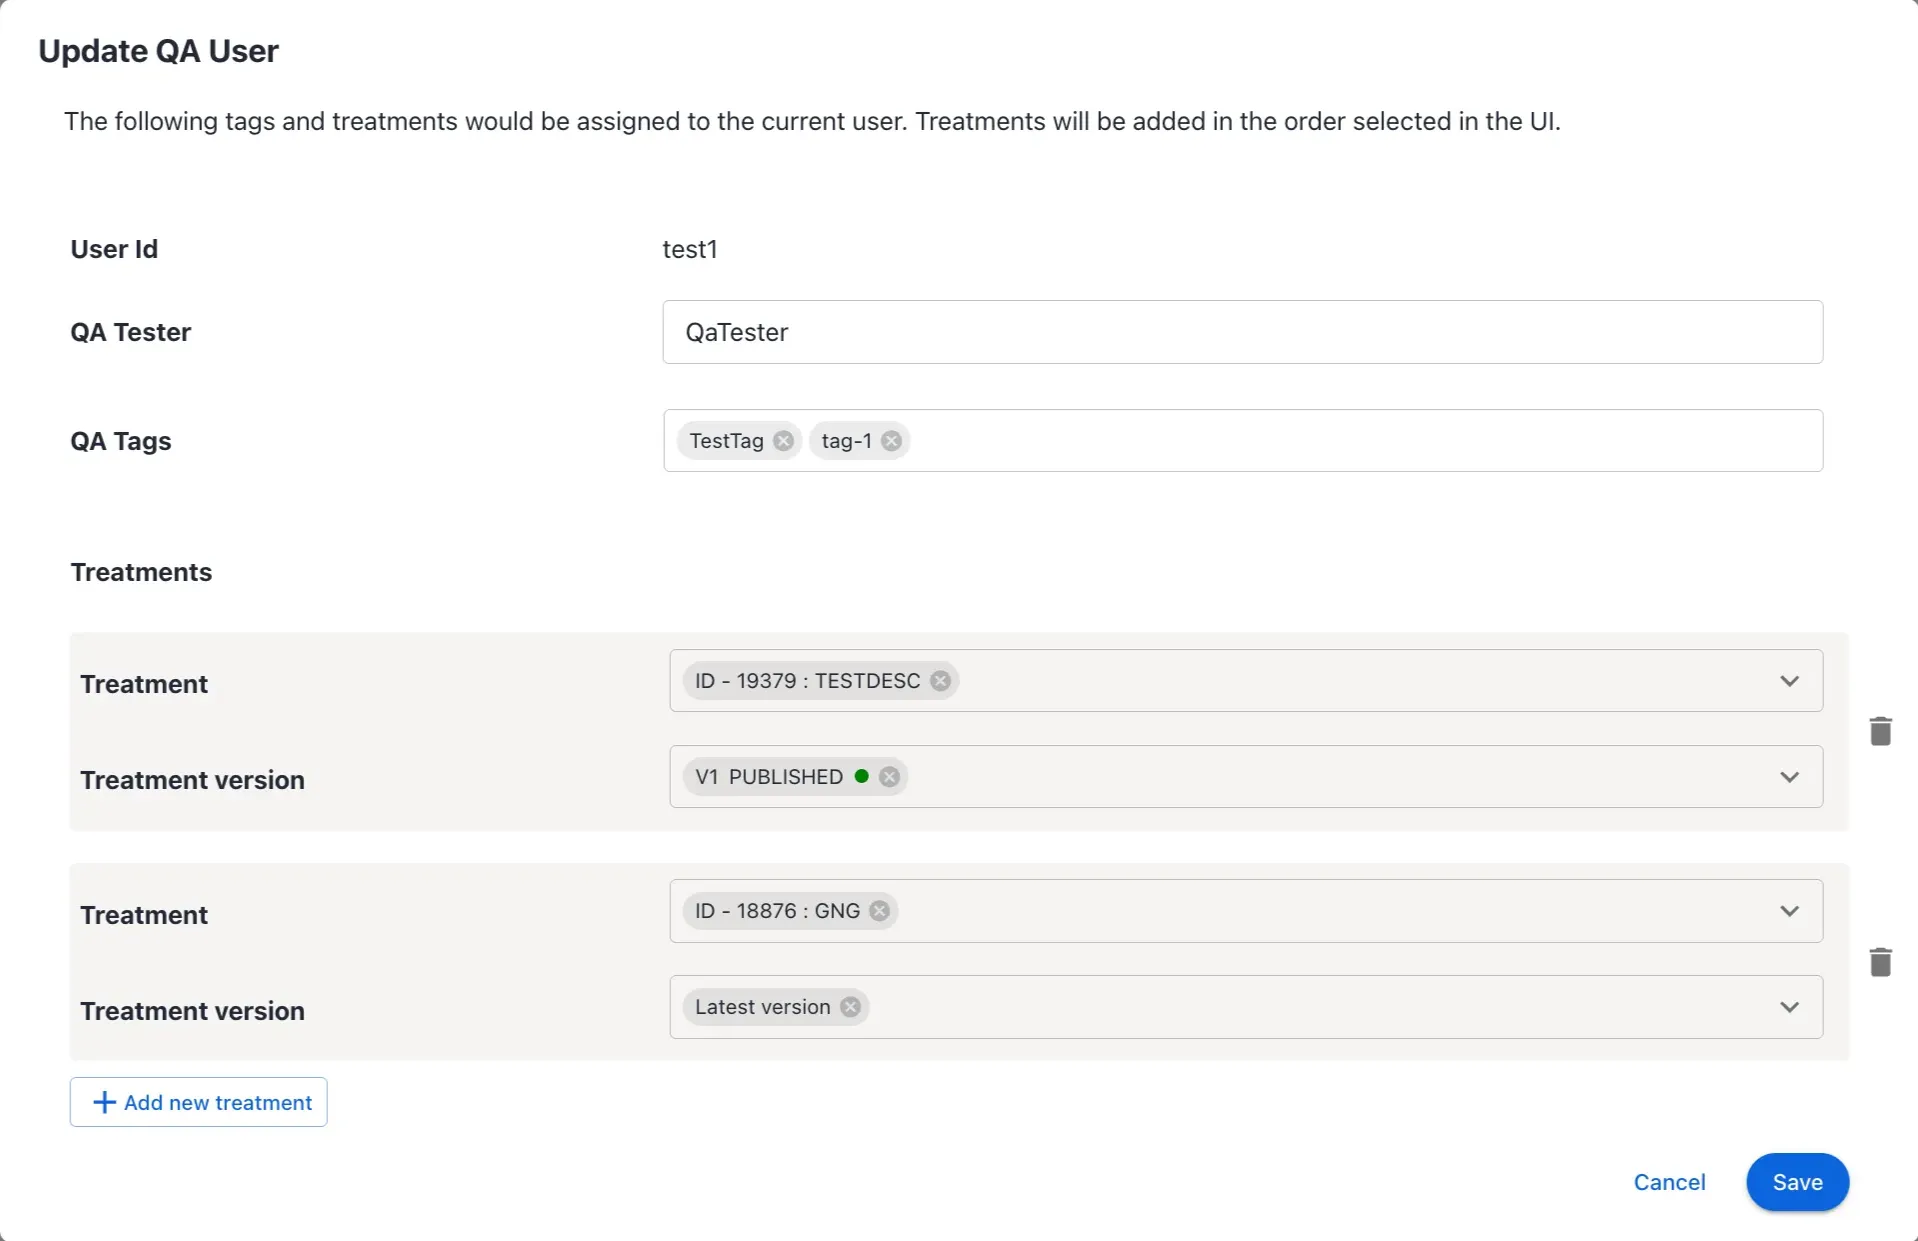
How to Update a QA User
Update QA User updates a single QA user with the configuration selected in the UI. Note that this replaces the existing configuration of the QA user with the current configuration.
- Click the Edit icon next to the Treatments column.
- Edit the QA Tester name.
- Add/Remove QA Tags.
- Add/Remove Treatments. At least one Treatment must be selected to proceed.
- Save the configuration.
How to Delete a QA User
- Click the Delete icon corresponding to the QA users to be removed.

- Ensure the QA user selected for deletion is correct.
- Delete the QA User.